

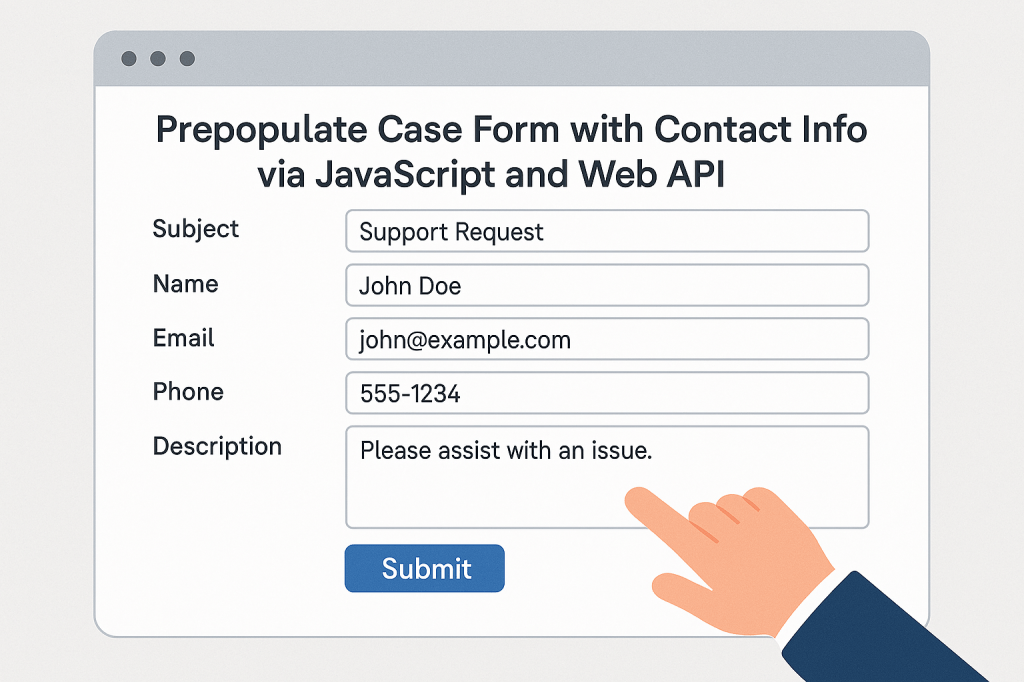
Another common scenario is to work on multiple tables using web api . In this post , we will see how to work with contact and incident(case) table to create a case
Step 1 : Create a webpage from power pages studio
Step 2: For the 2 tables contact and incident (case) create respective table permissions for contact and case tables as shown below

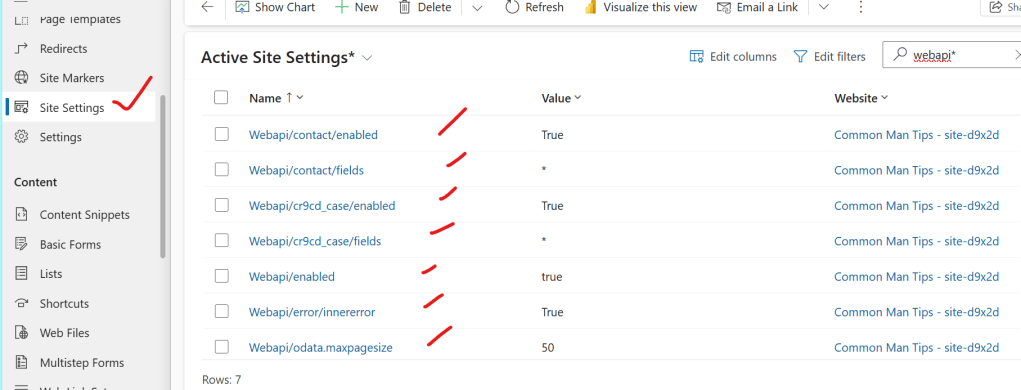
Step 3: Enable site settings for those 2 tables as shown below
Step 4 : Provide respective webroles to the page.
Step 5 : Now go the code view of page and then copy the below code
<div class="row sectionBlockLayout text-start" style="min-height: auto; padding: 8px;">
    <div class="container" style="display: flex; flex-wrap: wrap;">
      <div class="col-lg-12 columnBlockLayout" style="padding: 16px; margin: 60px 0px; min-height: 200px;"></div>
    {% assign currentContactId = request.params['contactid'] %}

<!DOCTYPE html>
<html>
<head>
    <h2>Power Pages - Autofill Contact Info with Validation and Submission</h2>
    <title>Power Pages - Autofill Contact Info with Validation and Submission</title>
    <script src="https://code.jquery.com/jquery-3.6.0.min.js"></script>
    <style>
        .spinner {
            display: none;
            width: 24px;
            height: 24px;
            border: 4px solid rgba(0, 0, 0, 0.1);
            border-left-color: #000;
            border-radius: 50%;
            animation: spin 1s linear infinite;
            vertical-align: middle;
        }

        @keyframes spin {
            to { transform: rotate(360deg); }
        }

        .toast {
            visibility: hidden;
            min-width: 250px;
            margin-left: -125px;
            background-color: #333;
            color: #fff;
            text-align: center;
            border-radius: 8px;
            padding: 16px;
            position: fixed;
            z-index: 1;
            left: 50%;
            bottom: 30px;
            font-size: 16px;
        }

        .toast.show {
            visibility: visible;
            animation: fadein 0.5s, fadeout 0.5s 2.5s;
        }

        @keyframes fadein {
            from { bottom: 0; opacity: 0; }
            to { bottom: 30px; opacity: 1; }
        }

        @keyframes fadeout {
            from { bottom: 30px; opacity: 1; }
            to { bottom: 0; opacity: 0; }
        }
    </style>
    <script>


    </script>
</head>
<body>
    <form id="caseForm">
        <label for="contact">Contact:</label>
        <select id="contact" name="contact" required>
            <option value="">-- Select Contact --</option>
            {% fetchxml contact_list %}
            <fetch version="1.0" output-format="xml-platform" mapping="logical" distinct="false">
              <entity name="contact">
                <attribute name="fullname" />
                <attribute name="contactid" />
                <order attribute="fullname" descending="false" />
              </entity>
            </fetch>
            {% endfetchxml %}
            {% for contact in contact_list.results.entities %}
                <option value="{{ contact.contactid }}">{{ contact.fullname }}</option>
            {% endfor %}
        </select>
        <span class="spinner" id="loadingSpinner"></span>

        <br><br>

        <label for="email">Email:</label>
        <input type="email" id="email" name="email" readonly required />

        <br><br>

        <label for="phonenumber">Phone Number:</label>
        <input type="text" id="phonenumber" name="phonenumber" readonly required />

        <br><br>

        <button type="submit">Submit Case</button>
    </form>

    <div id="toast" class="toast"></div>

    <script>


        $(document).ready(function () {


            $('#contact').on('change', function () {
                var contactId = $(this).val();
                if (contactId) {
                    getContactDetails(contactId);
                } else {
                    $('#email').val('');
                    $('#phonenumber').val('');
                }
            });

            $('#caseForm').on('submit', function (e) {
                e.preventDefault();
                const contactId = $('#contact').val();
                const email = $('#email').val();
                const phone = $('#phonenumber').val();

                if (!contactId || !email || !phone) {
                    showToast("All fields must be populated.");
                    return;
                }

                // Sample payload (customize per schema)
                const payload = {
                    "cr9cd_title": "Auto-created case",
                    "cr9cd_contact@odata.bind": "/contacts(" + contactId + ")",
                    "cr9cd_description": "Case auto-submitted from web form",
                    "cr9cd_contactemail": email,
                    "cr9cd_phone": phone
                };

                $.ajax({
                    url: "/_api/cr9cd_case",
                    type: "POST",
                    contentType: "application/json",
                    data: JSON.stringify(payload),
                    headers: {
                        "Accept": "application/json"
                    },
                    success: function () {
                        showToast("Case submitted successfully.");
                        $('#caseForm')[0].reset();
                    },
                    error: function (xhr, status, error) {
                        debugger;
                        console.error("Case submission error:", error);
                        showToast("Failed to submit case.");
                         $('#caseForm')[0].reset();
                    }
                });
            });

            function getContactDetails(contactId) {
                var apiUrl = "/_api/contacts(" + contactId.replace(/[{}]/g, '') + ")?$select=emailaddress1,telephone1";
                $('#loadingSpinner').show();

                $.ajax({
                    type: "GET",
                    url: apiUrl,
                    contentType: "application/json",
                    headers: {
                        "Accept": "application/json"
                    },
                    success: function (data) {
                        $('#email').val(data.emailaddress1 || '');
                        $('#phonenumber').val(data.telephone1 || '');
                        showToast("Contact details loaded successfully.");
                    },
                    error: function (xhr, status, error) {
                        console.error("Failed to retrieve contact data:", error);
                        $('#email').val('');
                        $('#phonenumber').val('');
                        showToast("Error fetching contact details.");
                    },
                    complete: function () {
                        $('#loadingSpinner').hide();
                    }
                });
            }

            function showToast(message) {
                var toast = $('#toast');
                toast.text(message).addClass('show');
                setTimeout(function () {
                    toast.removeClass('show');
                }, 3000);
            }
        });
    </script>
</body>
</html>

    </div>
  </div>
Step 6 : Save,publish and then perform the operation as shown below
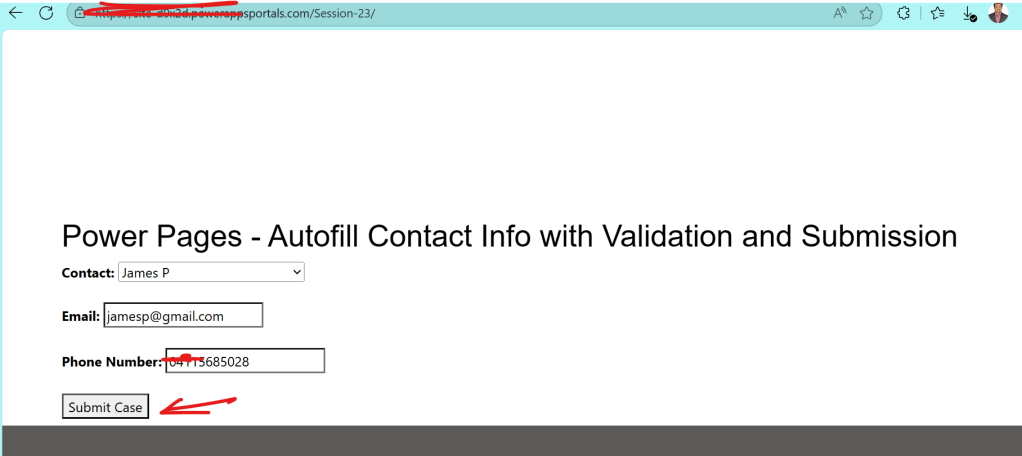
So on selection of contact from the list , contact details gets populated, and then on click on submit case a case will be created. In this way, one can easily write custom logic as per the requirement.
Note:
- You will encounter un authorized error / 403/401 if proper configurations steps 2 to 4 are not followed correctly.
Discover more from Common Man Tips for Power Platform, Dynamics CRM,Azure
Subscribe to get the latest posts sent to your email.
