

Introduction:
In Dynamics 365 CRM, by using Out of Box Features one can easily import data with the use of excel spread sheets. In this post , I am going to show how one can easily import contacts as an example in Dynamics 365 CRM with the help of templates.
Step 1 :
Login to the trial / D365 CRM Environment by giving username and password, if you want to know about how to create a trial environment you can refer to my earlier blogs as shown below .

Step 2 :
Now navigate to entity Contact and select My Active Contacts view and click on download template as shown below.

Step 3 :
In the Step 2, when user clicks on Download template a new popup will open like below as shown below and select on download which will download an predefined excel template corresponding to My Active Contacts View as shown below.

Step 4 :
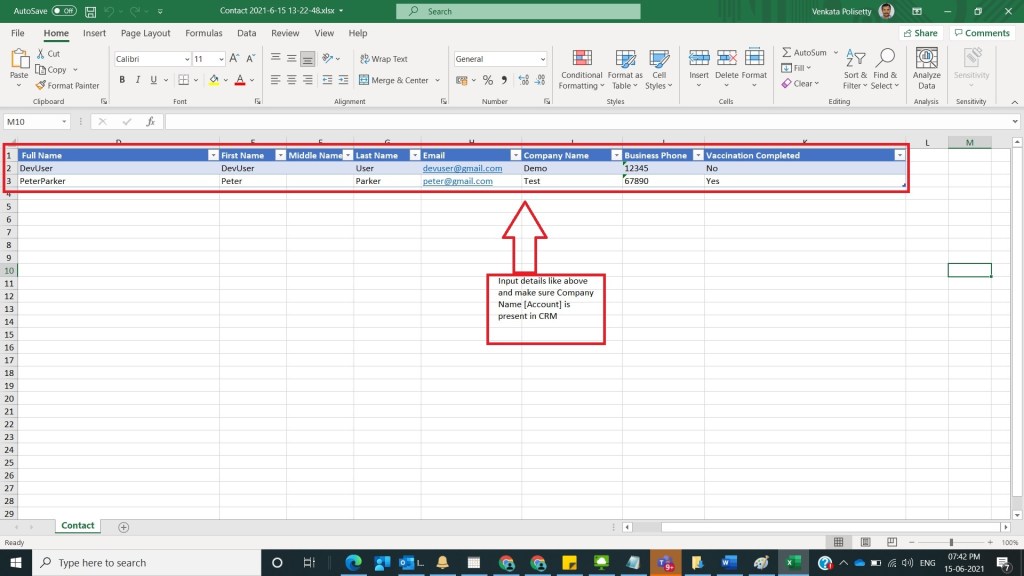
Open spread sheet which is downloaded from step 3 and open it ,it will look like below

Step 5 : As we are trying to create new contacts, delete existing rows and shown below

Step 6 : After deleting rows from the step 5, enter some contact information, here in the example I gave 2 contacts and save it as shown below.
Step 7 : Now again go to the CRM Environment like in Step 3 , and select 3 dots at the right and then select option Import from Excel as shown below.

Step 8 : After Step 7, a new quick import from excel shows and click on Choose file and select contact spread sheet which filled in Step 6 and click on open as shown below.

Step 9 : After Step 8, click on Next button as shown below .

Step 10 : After Step 9, click on Finish Import as shown below .

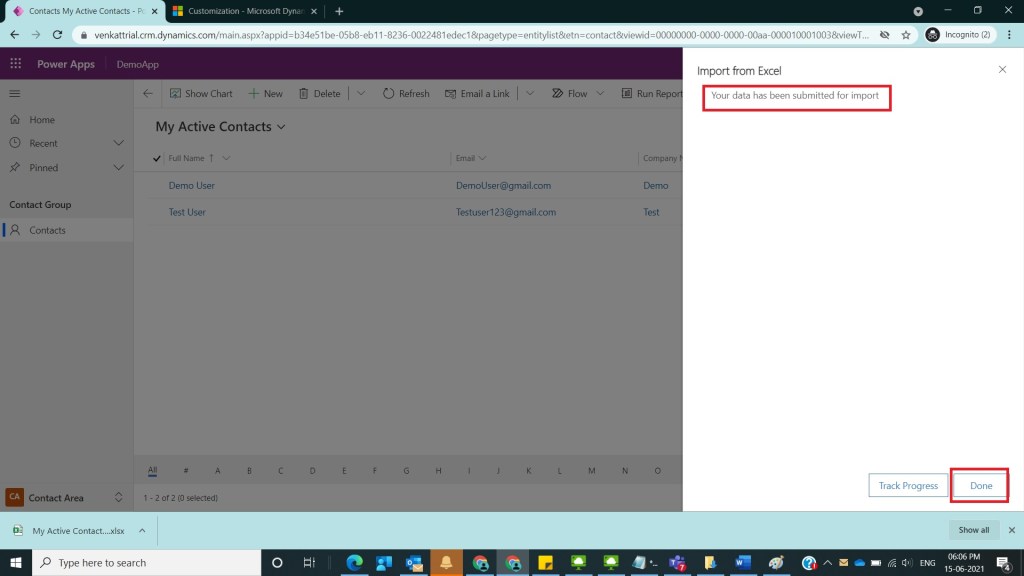
Step 11: After Step 10, a message will be shown your data has been submitted for import,click on Done as shown below
Step 12: After Step 11, Navigate to Settings -> Data Management as shown below

Step 13: After Step 12, Select Imports as shown below

Step 14: After Step 13, Select Imports and you can see 2 records that we have imported with status reason completed as shown below

Step 15: After Step 14, Go to My active contacts screen and you could observe 2 new records created as shown below

Note :
- In case if there are any mandatory fields then those fields to needs to be mapped
- Don’t change any column names of the Downloaded Excel Template of step 2.
Conclusion:
In this way , one can easily do simple data import of contacts into Dynamics CRM with Out of Box features of Dynamics CRM.
Discover more from Common Man Tips for Power Platform, Dynamics CRM,Azure
Subscribe to get the latest posts sent to your email.

Thanks for sharing, Great Post 👍! It’s really helpful.
LikeLiked by 1 person
Thanks for sharing, Great Post 👍. It’s really helpful.
LikeLiked by 1 person
Pingback: Back To Basics # : Curated List of Articles in a Single Page – Common Man Tips for Power Platform, Dynamics CRM,Azure