

Introduction:
In Dynamics 365 CRM or Power Platform, under Configuration Migration category Data Migration Utility is useful to prepare a data file by creating Schema file first and then export data in a selected CRM Environment. By using the following process one can easily create schema file and export data from generated schema file in few minutes. As an example, account entity /table is considered for explanation
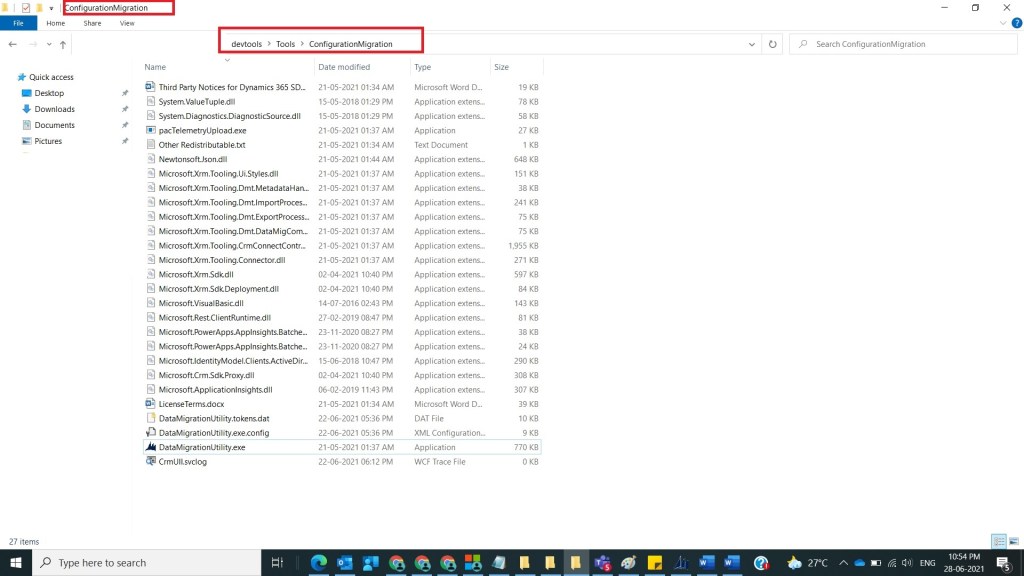
Step 1:
Navigate to the folder where CRM Tools are generated by Power shell as shown in below, if you want to know about how to generate CRM tools using power shell, refer to my earlier post.
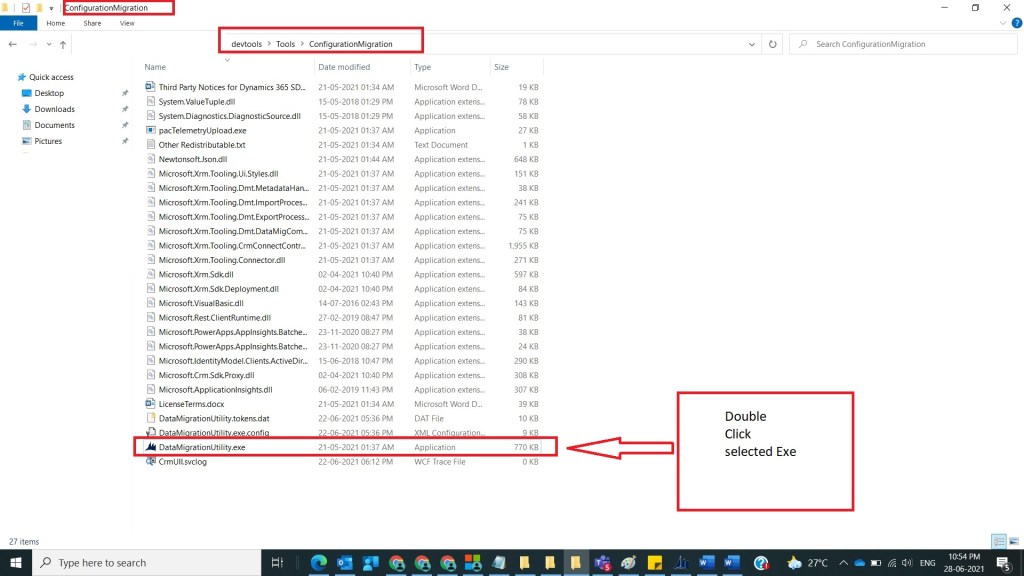
Step 2:
After Step 1, locate DataMigrationUtility.exe in folder and double click on it as shown below.
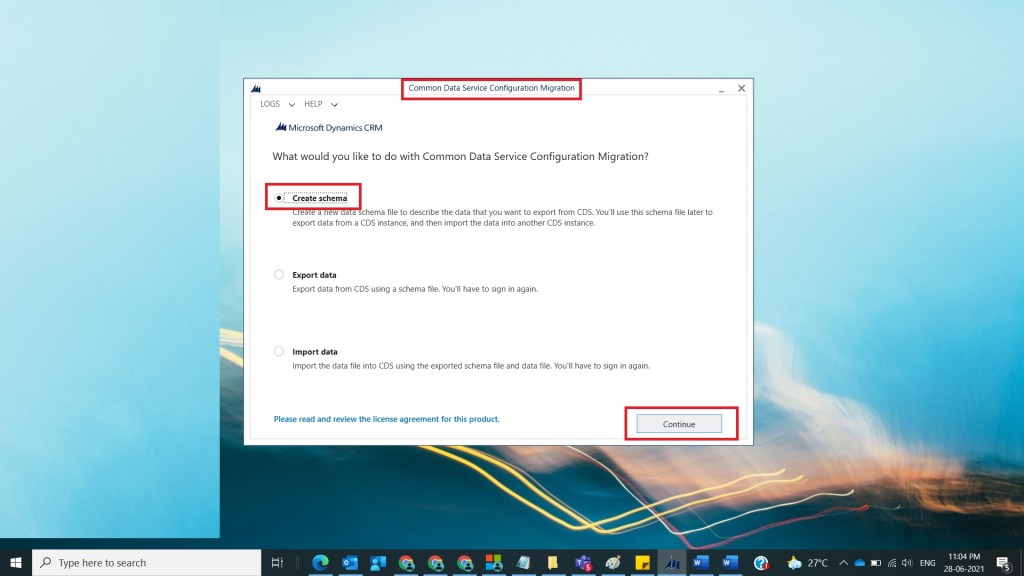
Step 3:
After Step 2, Data Migration Utility exe opens Data Migration utility related application which was downloaded earlier as shown below.

Step 4:
After Step 3, Select Create Schema Option and click on continue as shown below
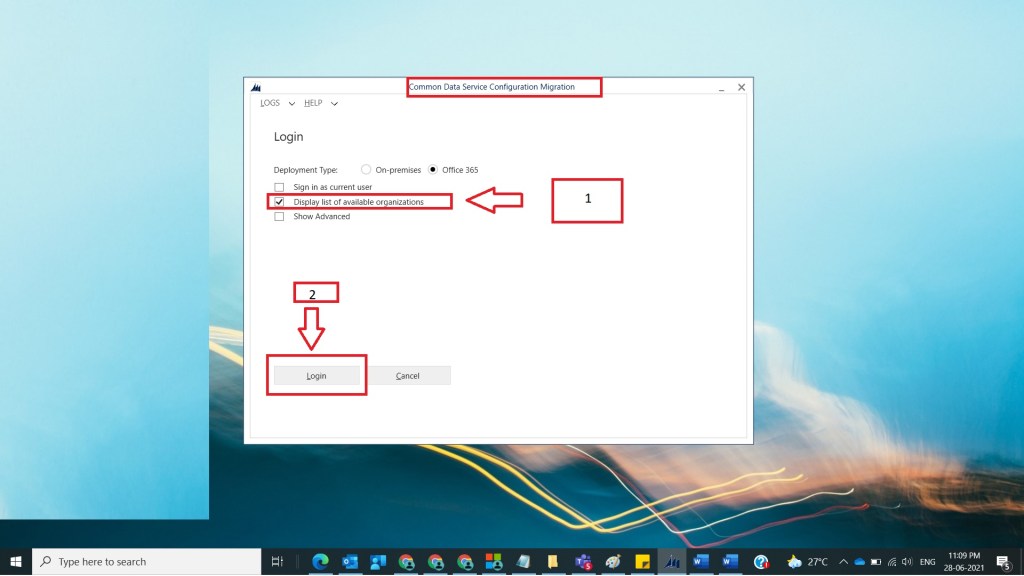
Step 5:
After Step 4, in Common Data Service Configuration Migration tool next screen will be shown up and select Display list of available organizations and click on Login as shown below
Step 6:
After Step 5, provide login details of your trial / Development / related CRM environment as shown below
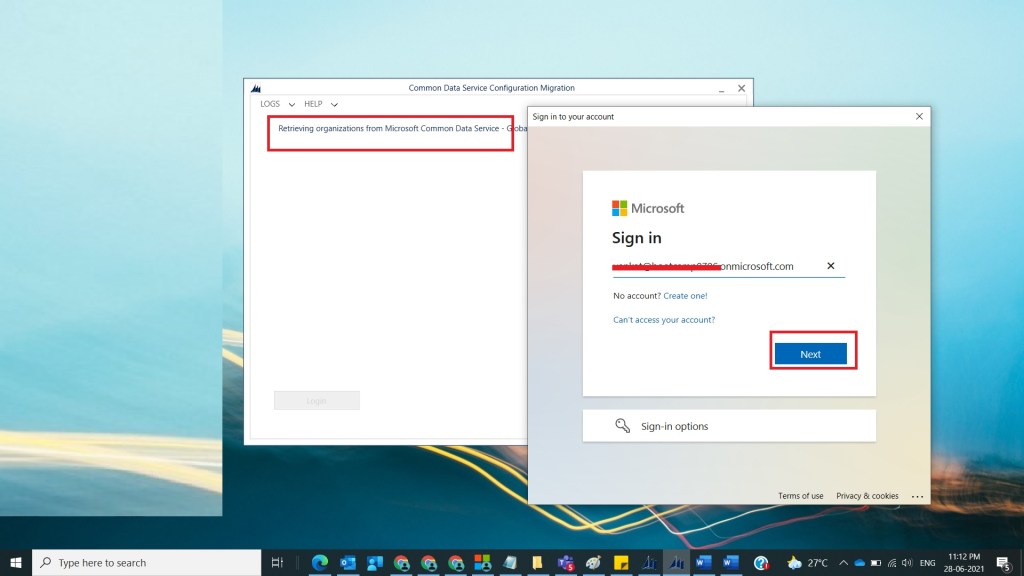
Step 7:
After Step 6, once login is succeeded following new screen will open as shown below

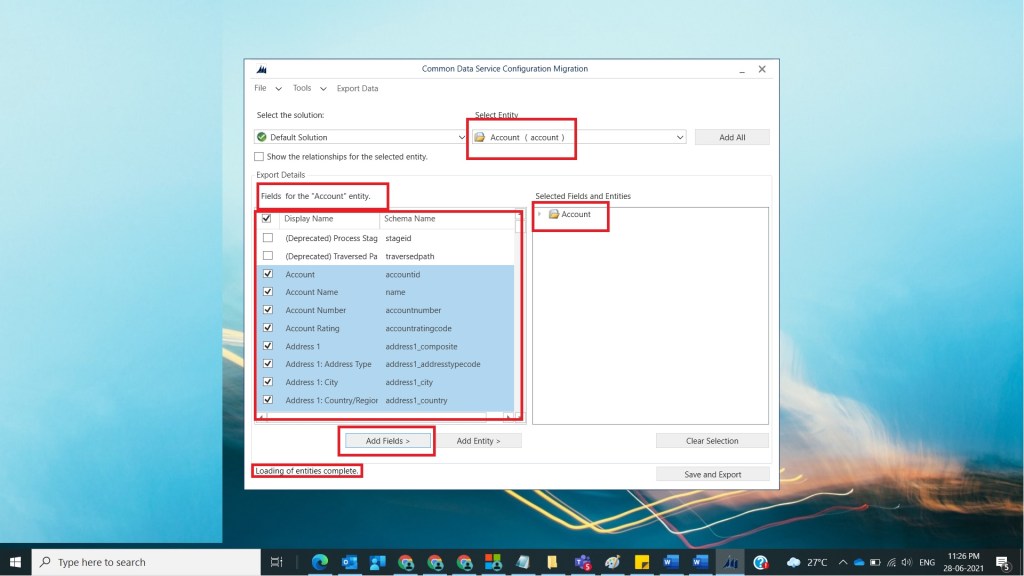
Step 8:
After Step 7, select account entity and select the following fields make sure not to select all fields and skip few Out of Box fields like created by,created on,Modified By , Modified On,import sequence number and date fields ,owner related fields, Time zone Rule Version , UTC Conversion and click on Add Fields
Note: If specific fields are selected make sure to select Add Fields > option as shown below
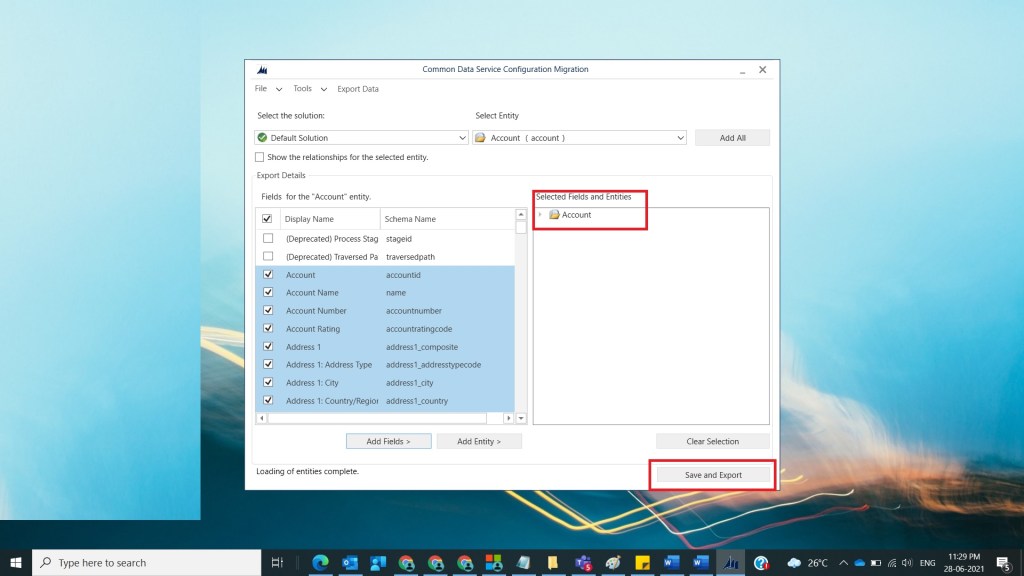
Step 9:
After Step 8, in the right hand side under Selected Fields and Entities Account Entity will be shown and then click on Save and Export as shown below
Step 10:
After Step 9, a file dialog appears with title Enter the file name for the generated schema file there give required name here I provided Account Schema and click on save as shown below.

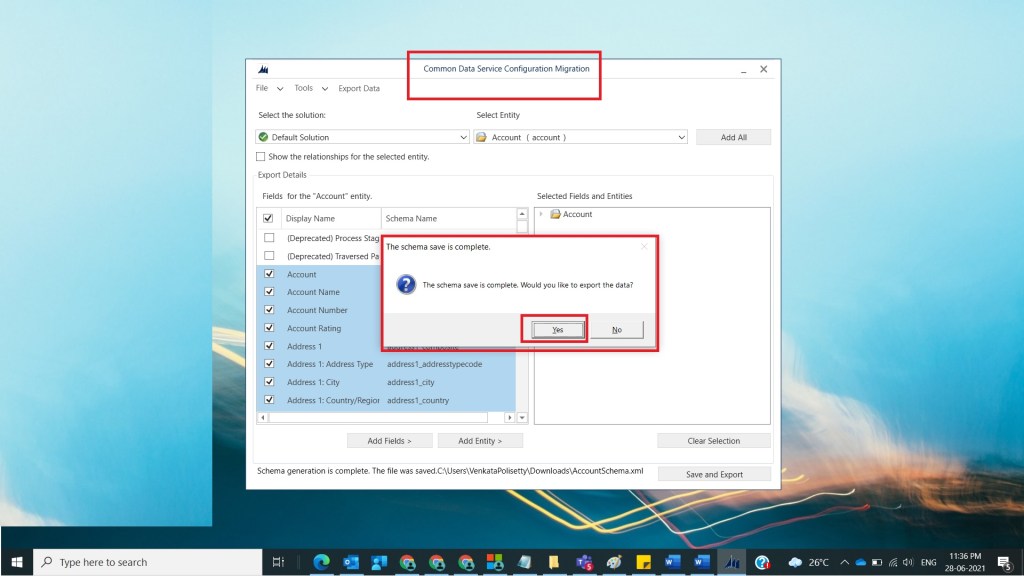
Step 11:
After Step 10, a new confirm dialog appears with message The schema save is complete .Would you like to export the data? , select yes as shown below.
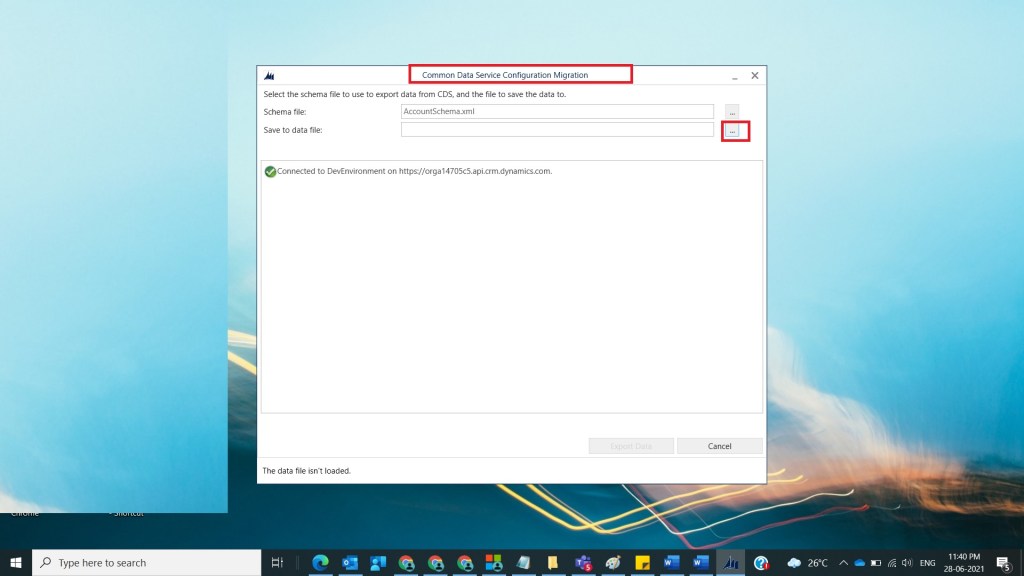
Step 12:
After Step 11, new window will appear under save to data file option select … in the right side as shown below
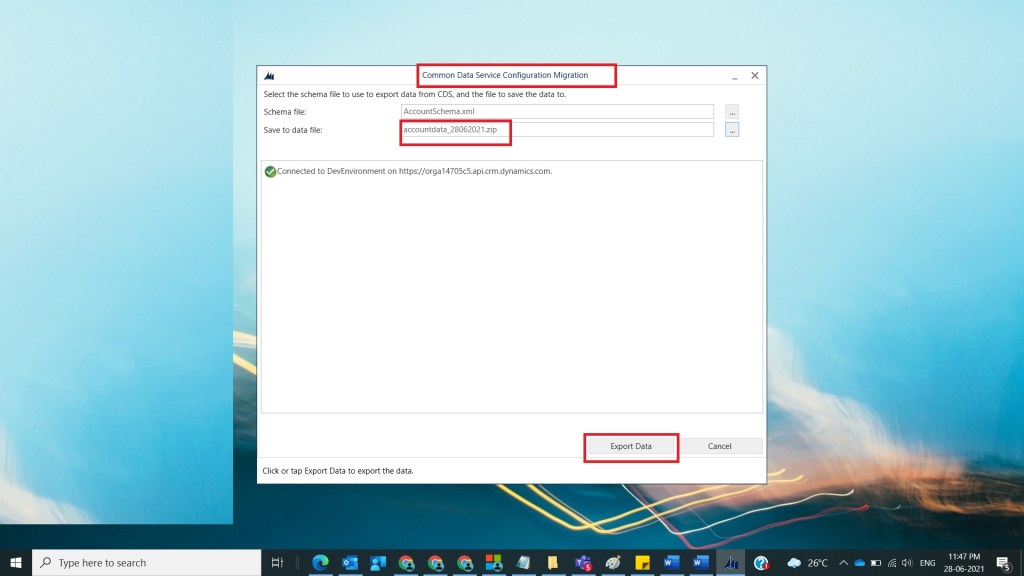
Step 13:
After Step 12, Export Output file popup will appear there you can provide data file name to save account data here in this example will provide accountdata_28062021 and click on save as shown below.

Step 14:
After Step 13, provided data file name appears beside Save to data file option and click on Export Data as shown below.
Step 15:
After Step 14, respective data file will be generated as shown below. And one can open generated file by selecting option in the popup window Open file location for as shown below.

Step 16:
After Step 15, our data file is ready for account entity/ table which can be imported to another environment.
Note: Following points to keep in mind while generation of data file.
- Give user defined data schema and data files to unique identification.
- Always keep track of folder where this file is extracted.
- Take proper care while selecting fields in the selected table/entity.
- Take proper care while providing lookups,Date time fields.
Conclusion:
In this way ,one can easily generate a data file from CRM Environment to export it to another trial/development/designated environment.
Discover more from Common Man Tips for Power Platform, Dynamics CRM,Azure
Subscribe to get the latest posts sent to your email.

Pingback: Back to Basics # 10: Import Data File into Dynamics D365 Environment using Data Migration Utility – Common Man Tips for Power Platform, Dynamics CRM,Azure
Pingback: Back To Basics # : Curated List of Articles in a Single Page – Common Man Tips for Power Platform, Dynamics CRM,Azure