

Introduction:
In Power Platform, at times we must take care of the number of flow runs per day based on API Limits so that we can run the flow only when it is needed. In Power automate this can be taken care by using Flow trigger condition available on trigger point of the flow.To explain this a basic automated flow was taken where on modification of any contact record if at all discount is equal to 50 then only I want my flow to run in all other cases flow should not be run.
Step 1:
Login to the required Power Apps environment using URL make.powerapps.com by providing username and password and click on Flows on the left-hand side as shown in the below figure.

Step 2:
After Step 1, Click on New ->Automation->Cloudflow -> Automated and select automated cloud flow and select When a row is added ,modified or deleted in Microsoft Dataverse trigger and click on Create as shown in the below figure.

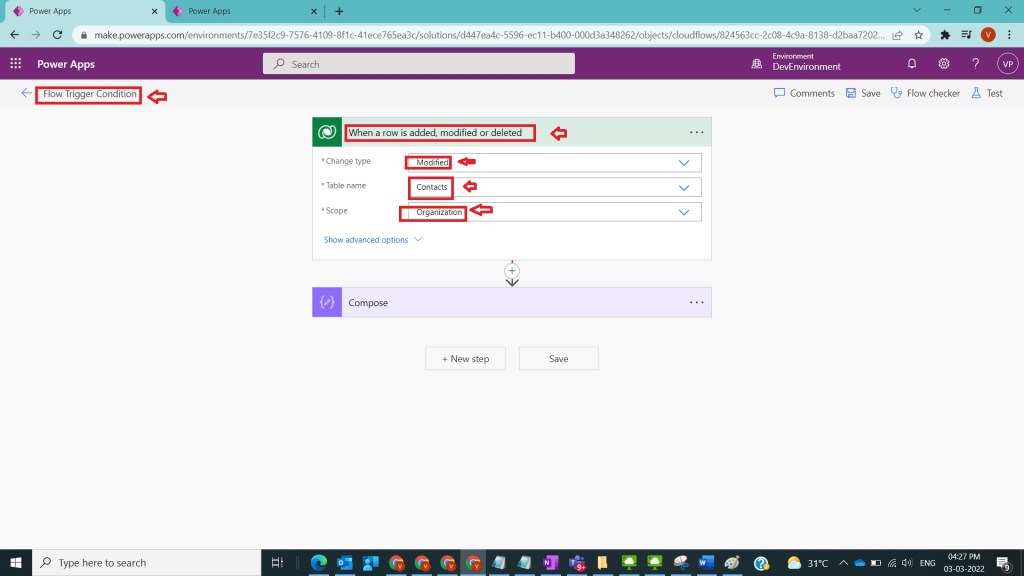
Step 3:
After Step 2, name the flow as Flow Trigger Condition and on trigger when a row is added , modified, or deleted select the following values
Change Type : Modified
Table name : Contacts
Scope : Organization
as shown in the below figure.
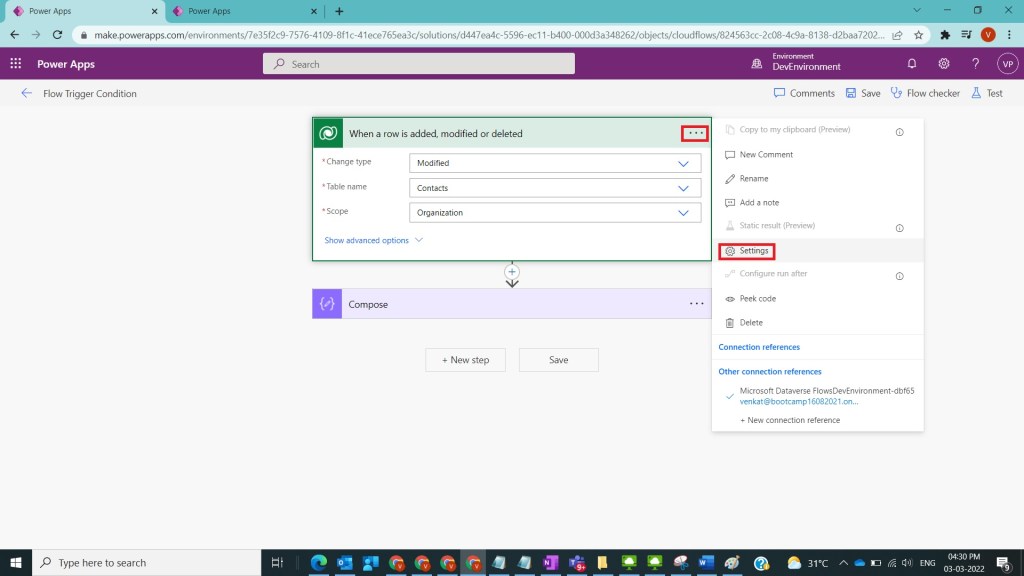
Step 4:
After Step 3, on trigger click on the 3 dots and select settings as shown in the below figure.
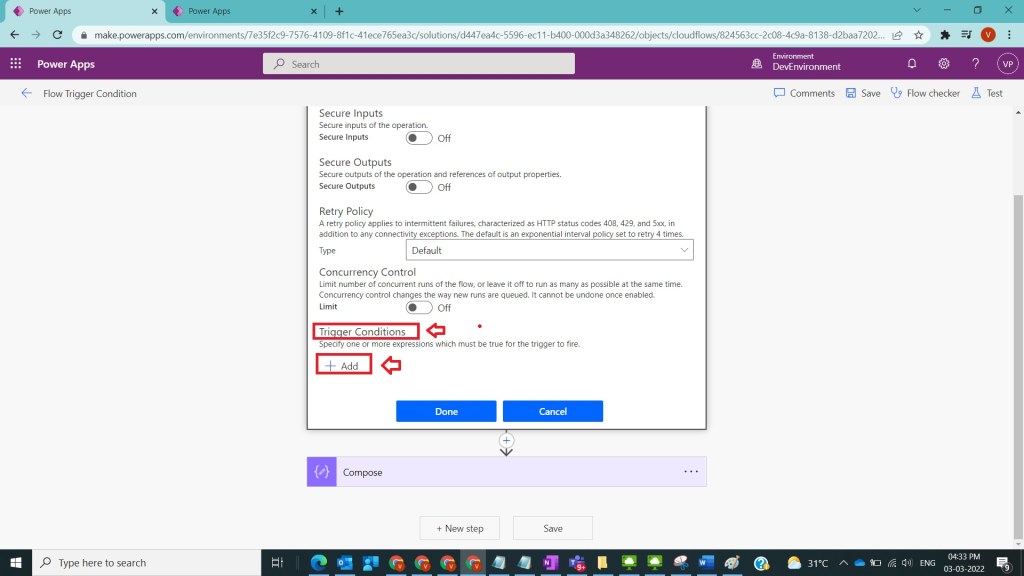
Step 5:
After Step 4, navigate to Trigger Conditions section and click on +
as shown in the below figure.
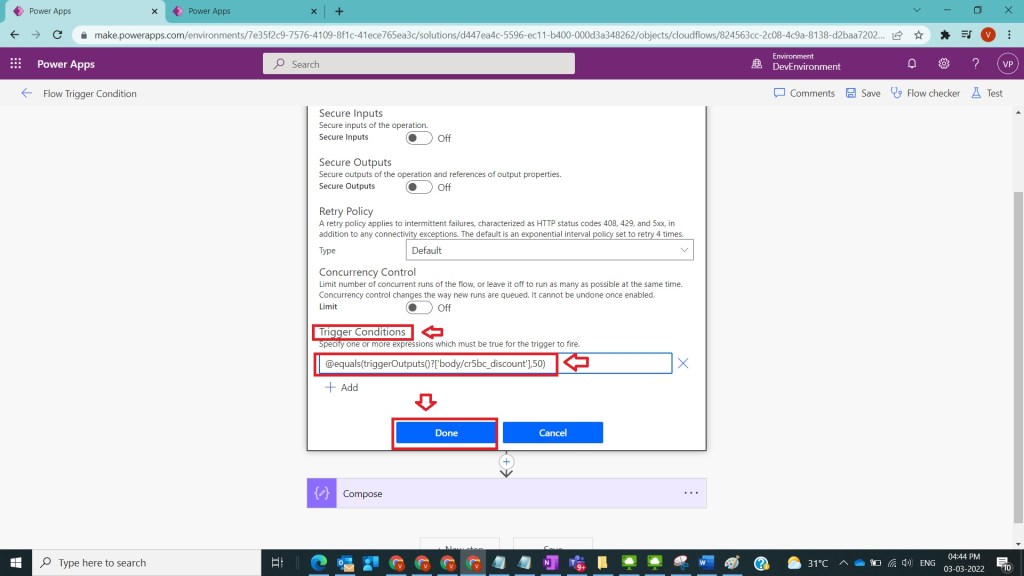
Step 6:
After Step 5,provide the condition that discount value in contact record is 50 then only trigger the flow with the below value
@equals(triggerOutputs()?[‘body/cr5bc_discount’],50)
and click on Done,as shown in the below figure.
Step 7:
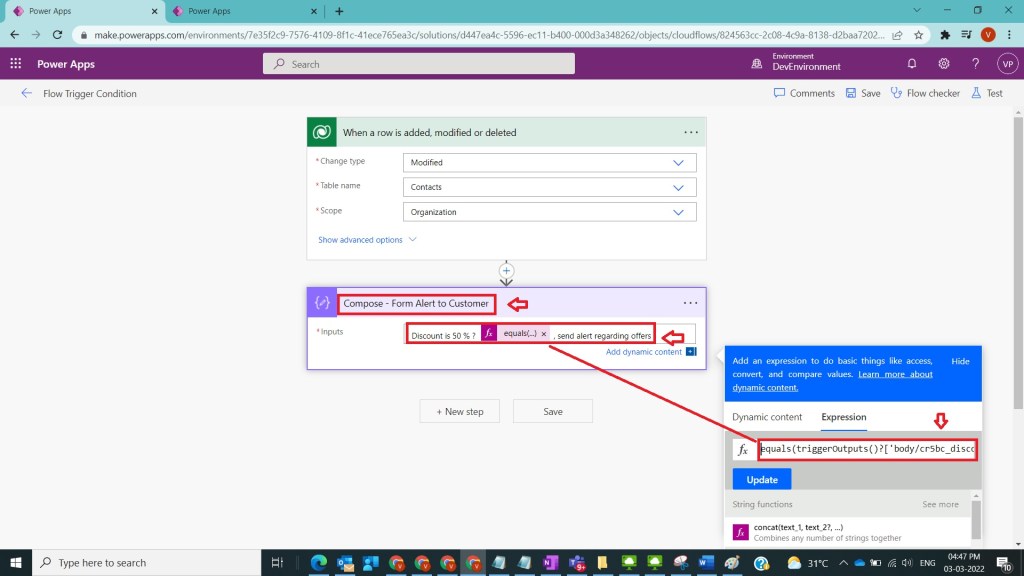
After Step 6, take compose action and name it as Compose – Form Alert to Customer and provide below input value
As
Inputs : Discount is 50 % ? @{equals(triggerOutputs()?[‘body/cr5bc_discount’],50)} , send alert regarding offers
as shown in the below figure.
Step 8:
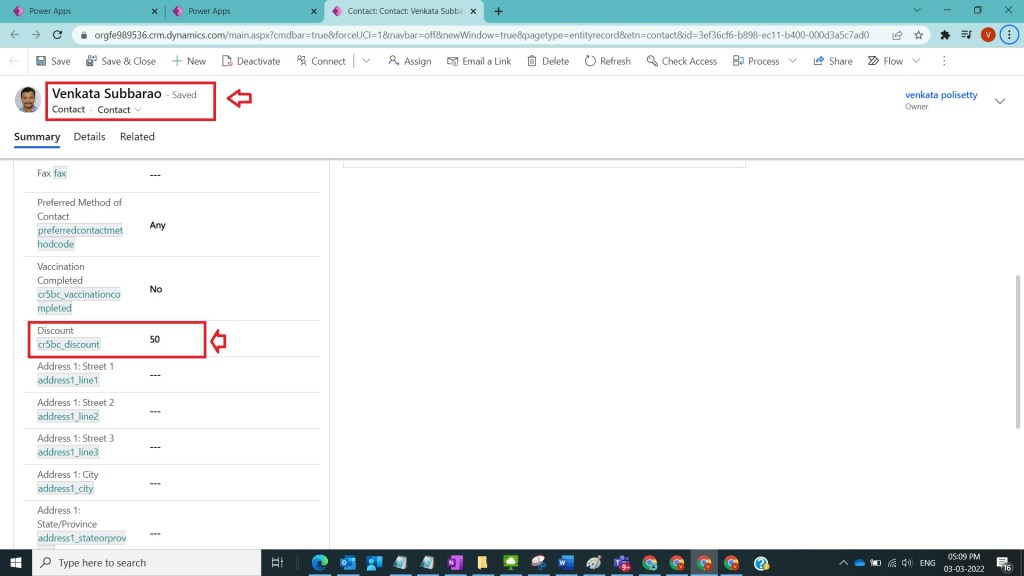
After Step 7, save and open a contact record which have discount 50 and update any field and click on save as shown in the below figure
Step 9:
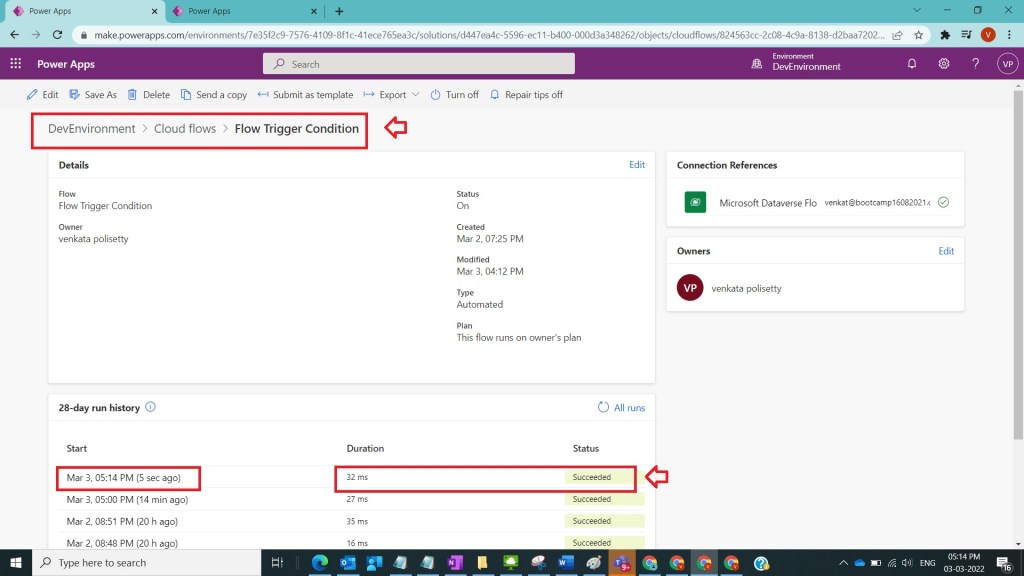
After Step 8, go to the flow runs and observe a flow run in the flow run results as shown in the below figure
Step 10:
After Step 9, open a contact record which have discount which is not 50 and update any field and click on save as shown in the below figure

Step 11:
After Step 10, observe flow runs result and you can observe no runs as shown in the below figure

Note:
- Make sure to save the flow whenever you try expressions.
- Make sure you provide valid expression as flow trigger , peek code can be used to get correct expression information.
- Microsoft documentation related to power automate limits for both licensed and unlicensed can be found here
Conclusion: In this way we can use Flow trigger condition in power automate to efficiently manage flow runs .
Discover more from Common Man Tips for Power Platform, Dynamics CRM,Azure
Subscribe to get the latest posts sent to your email.

Pingback: Rewind March 2022 – Common Man Tips for Power Platform, Dynamics CRM,Azure
Pingback: Rewind March 2022 - Microsoft Dynamics CRM Community
Pingback: Rewind March 2022 - Microsoft Dynamics CRM Community