

Introduction:
During certain scenarios it is required to call bound action . To call a bound action we can do it with javascript , plugins and power automate. In all the other methods except power automate you have to write explicit logic to call an bound action. As an example, we call a sample bound action which was built for contact entity/table from power automate.
Step 1:
Login to the required Power Apps environment using URL make.powerapps.com by providing username and password and click on Flows on the left-hand side as shown in the below figure.

Step 2:
After Step 1, Click on New Flow and select instant cloud flow and provide the trigger as Manually trigger a flow and click on Create as shown in the below figure.

Step 3:
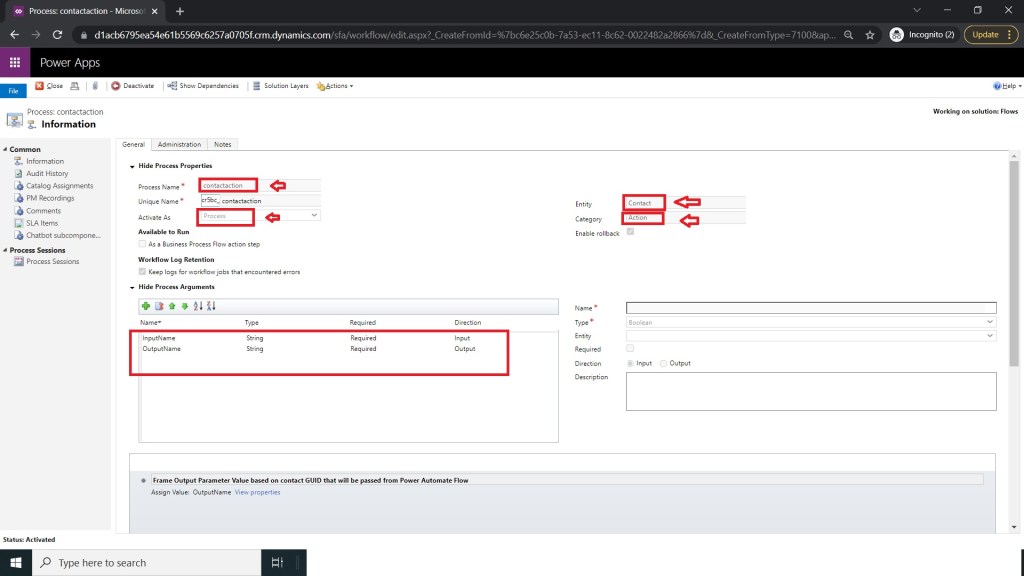
After Step 2 ,you have to build an bound action on contact entity with input and output arguments of string type as shown in the below figure.
Step 4:
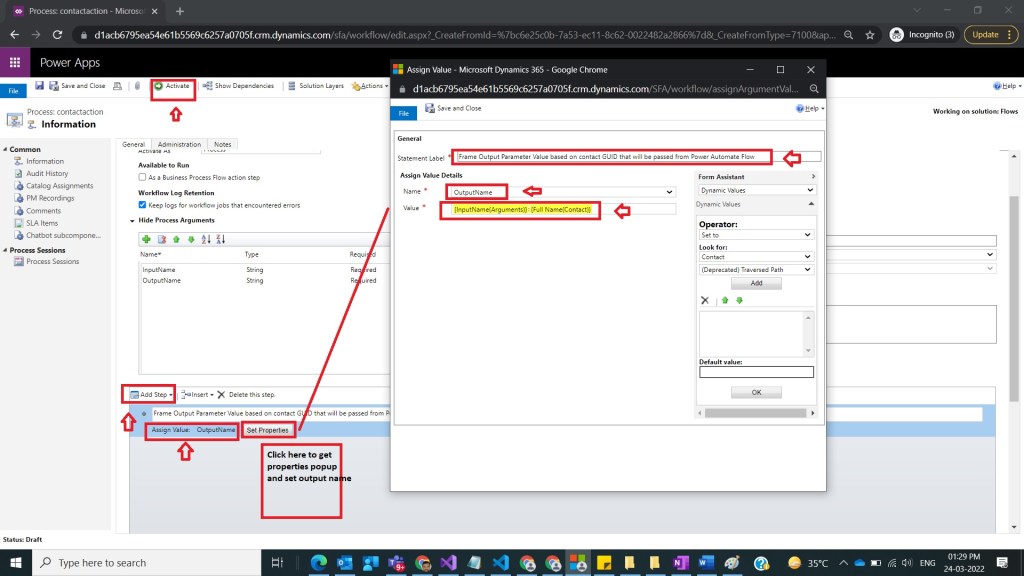
After Step 3 ,make sure to use Assign value Step and then on click of properties button a popup will open there provide the value for OutputName by providing full name of the contact and activate action after closing popup as shown in the below figure.
Step 5:
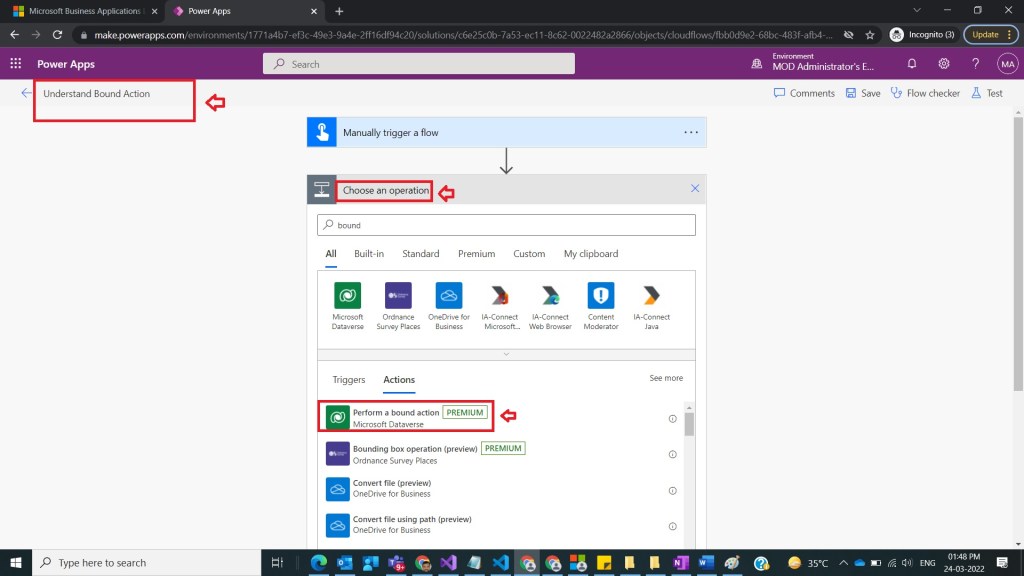
After Step 4 , go back to the flow screen which we have created in the step 2 and name the flow as Understand Bound Action and under actions select perform a bound action as shown in the below figure.
Step 6:
After Step 5, under perform a bound action provide the following inputs as
Table name : contacts
Action name : cr5bc_contactaction
Row ID : 42f3c213-2f63-ec11-8f8f-000d3a9ebd69 <copy guid of any contact record and paste it here>
Input Name : Contact Full Name
as shown in the below figure.

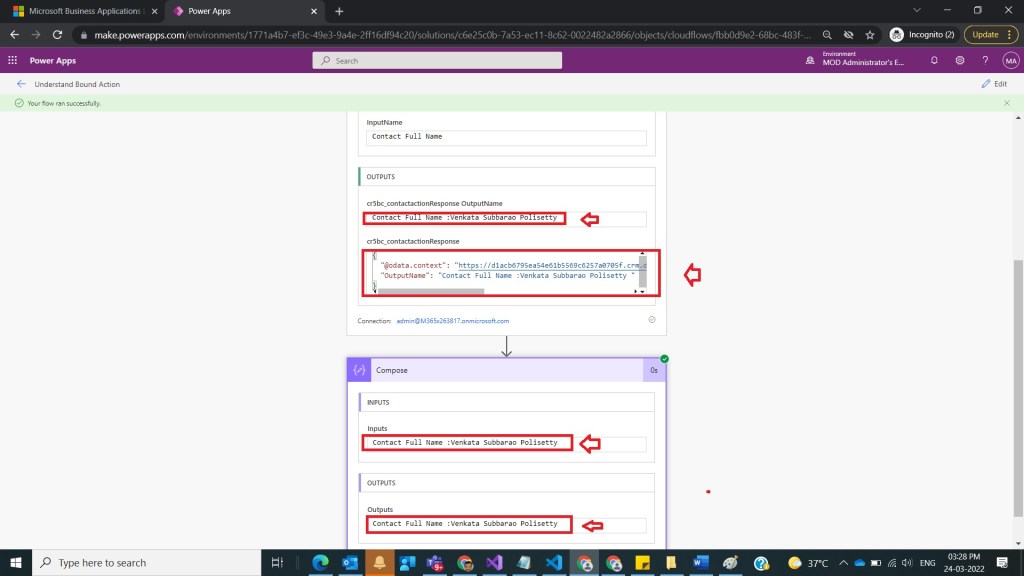
Step 7:
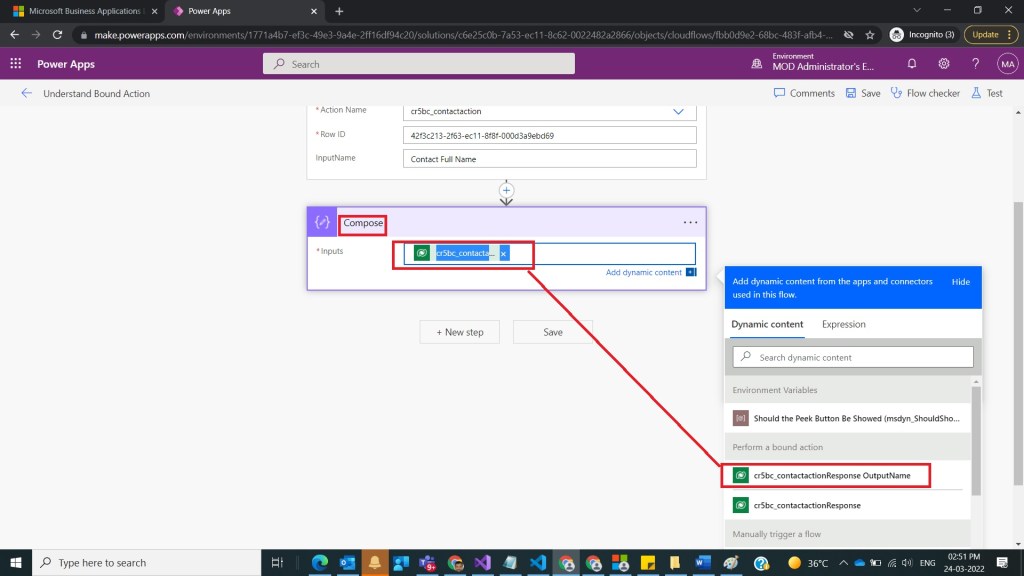
After Step 6, take compose action and select outputname as an input
Inputs : @{outputs(‘Perform_a_bound_action’)?[‘body/OutputName’]}
as shown in the below figure.
Step 8:
After Step 7, save and test the flow and observe output as shown in the below figure.
Note:
- In action , under add step you can specify condition as well, just for demo purpose I have not provided it.
- If you don’t see output parameter property in the result json , then the issue was in the action you have not assigned any value to output Name.
- In case if you are using automated flow then in step 6 no need of hardcoding contact GUID, you can directly extract the value from contact and assign.
Conclusion: In this way we can call bound action from power automate with out writing explicit code.
Discover more from Common Man Tips for Power Platform, Dynamics CRM,Azure
Subscribe to get the latest posts sent to your email.

Pingback: Rewind March 2022 – Common Man Tips for Power Platform, Dynamics CRM,Azure