


Introduction:
Generally to handle multiple conditions then like in javascript and C# .net switch will be used, in the same way in Power automate also we can use Switch action. In this article we can see how it can be used to decide whether a person can take vaccination or not.
Step 1:
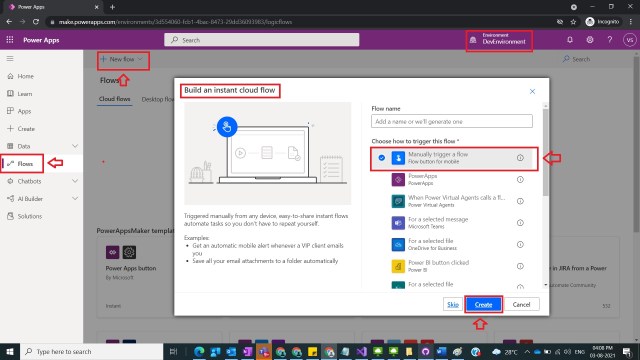
Login to the required Power Apps environment using URL make.powerapps.com by providing username and password and click on Flows on the left-hand side as shown in the below figure.

Step 2:
After Step 1, Click on New Flow and select instant cloud flow and provide the trigger as Manually trigger a flow and click on Create as shown in the below figure.
Step 3:
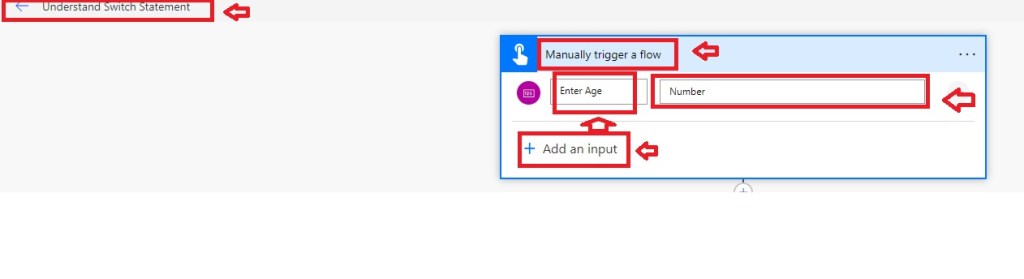
After Step 2 , name the flow as Understand Switch Statement and in Manually trigger provide input values as
Title : Enter Age
Value : Number
as shown in the below figure.
Step 4:
After Step 3 , Take Initialize variable action and provide the values as below
Name : Age
Type : Integer
Value : @{triggerBody()[‘number’]} [ From Step 3]
as shown in the below figure.

Step 5:
After Step 4, take Switch Action and provide the value
On : @{variables(‘Age’)}
and in one part of Case provide the value as
Equals 19
and take a compose function and provide the inputs as
Inputs : Can take vaccine
as shown in the below figure.

Step 6:
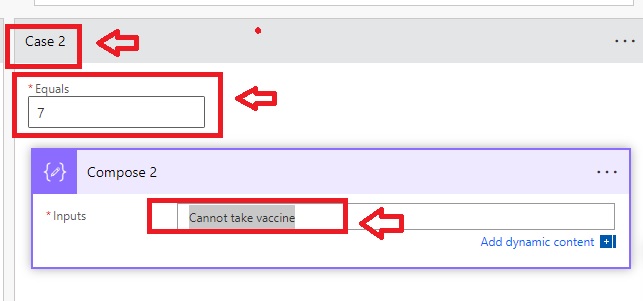
After Step 5, take another case section and name it as Case 2 and provide
Equals : 7
And take compose action and provide inputs as
Inputs : Cannot take vaccine
as shown in the below figure.
Step 7:
After Step 6, under switch statement under default section take an compose action and provide the inputs as
Inputs : Thanks for your interest , please wait for our message.
as shown in the below figure.

Step 8:
After Step 7, now save and test the flow and provide the value as 19 you should see the first case part will be executed as shown in the below figure.

Step 9:
After Step 8, now save and test the flow and provide the value as 78 you should see the default section of switch will be executed as shown in the below figure.

Note:
- Just like a normal switch case all the case options can be handled.
Conclusion: In this way we can easily use switch action to handle different conditions in power automate.
Discover more from Common Man Tips for Power Platform, Dynamics CRM,Azure
Subscribe to get the latest posts sent to your email.

Pingback: Rewind April 2022 – Common Man Tips for Power Platform, Dynamics CRM,Azure