

Introduction
Organizations today need quick, user-friendly business applications that can be built rapidly without heavy development effort. Traditional application development often involves longer delivery timelines, dependency on development teams, and increased implementation costs.
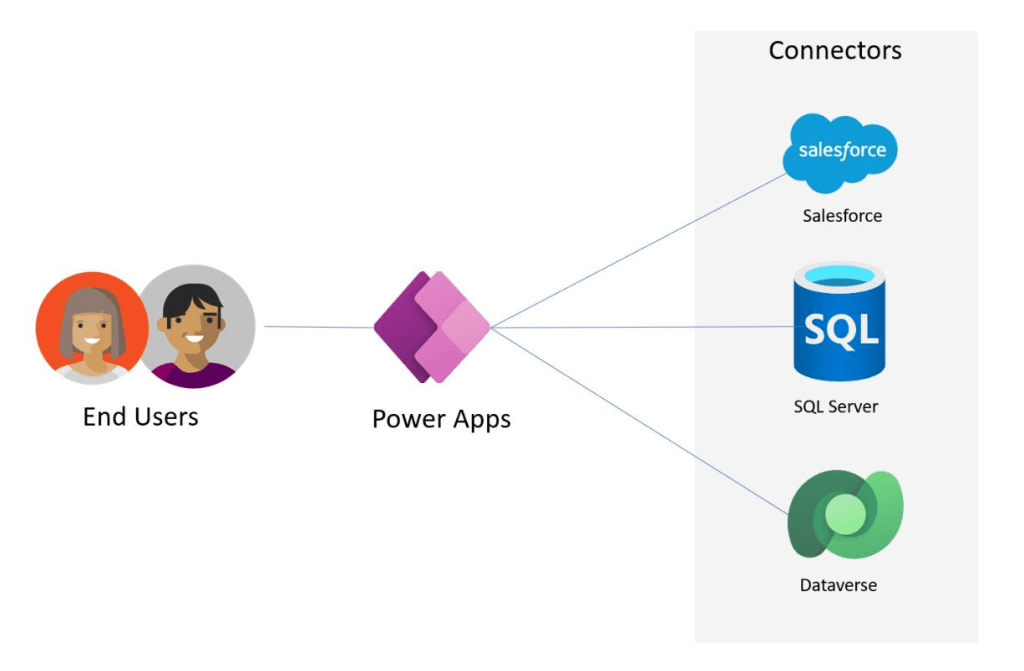
Microsoft Power Apps Canvas Apps help address this challenge by enabling organizations to rapidly create business applications using a low-code approach. Canvas Apps provide flexibility in UI design, seamless connectivity with multiple data sources, and the ability to implement business logic using Power Fx.
In this article, we will walk through the complete process of building your first Canvas App—from setting up the environment to creating screens, adding controls, connecting data, and implementing responsive layouts.
Business Scenario
Consider a simple business requirement where an organization wants to create an Employee Request Application. The purpose of this application is to allow employees to submit requests, track the status of submitted requests, and enable business teams to review them efficiently.
The application requires:
- A user-friendly interface for request submission
- A data source to store request details
- Navigation between screens
- Responsive layout support for different devices
Using Canvas Apps, this requirement can be implemented quickly without traditional coding.
Step 1 – Access the Power Apps Environment
The first step is to access the Power Apps Maker Portal. After signing in, select the environment where the application needs to be created.
It is recommended to use:
- Development Environment for app creation
- Test Environment for validation
- Production Environment for deployment
Using proper environments helps maintain governance, version control, and deployment discipline.
Step 2 – Create a New Canvas App
From the Power Apps Maker Portal, choose the option to create a new Canvas App.
Select the layout type based on the device requirement:
- Tablet Layout for larger screens
- Phone Layout for mobile users
For this example, we will use a tablet layout and name the app Employee Request App.
This creates the base structure of the application.
Step 3 – Understand the Canvas App Designer
Once the application is created, the Canvas App Designer opens. This interface includes:
- Tree View for screens and controls
- Canvas Area for UI design
- Properties Pane for configuring selected controls
- Formula Bar for Power Fx expressions
This designer enables makers to create application screens visually while implementing logic through formulas.
Step 4 – Add Screens
The next step is to create screens for the application.
For this example, add:
- Home Screen
- Request Form Screen
- Request List Screen
Using clear naming conventions improves maintainability.
Recommended screen names:
scrHomescrRequestFormscrRequestList
These screens help organize the user journey within the app.
Step 5 – Add Controls to Build the UI
Controls form the user interface of the application.
On the Home Screen, add:
- Labels
- Buttons
On the Request Form Screen, add:
- Text Input controls
- Dropdown controls
- Date Picker
- Submit Button
Example fields:
- Employee Name
- Request Type
- Request Date
These controls capture user input and create the front-end experience of the application.
Step 6 – Add Navigation Logic
Navigation between screens is implemented using Power Fx formulas.
For example, when a user clicks the Create Request button, the app should open the Request Form Screen.
The formula used is:
Navigate(scrRequestForm, ScreenTransition.Fade)
This formula is assigned to the OnSelect property of the button.
This introduces application behavior without traditional programming.
Step 7 – Connect to a Data Source
To store application data, the app needs to connect to a data source.
Common options include:
- Dataverse
- SharePoint
- SQL Server
For enterprise applications, Dataverse is often the preferred option because it provides:
- Secure storage
- Relationship management
- Role-based access
- Scalability
For this example, connect the app to a Dataverse table named Employee Requests.
This enables the app to store submitted request records.
Step 8 – Submit Form Data
Once the data source is connected, the form must save data into the selected table.
Using Power Fx, data submission can be handled through the Patch() function.
The logic collects values entered by the user and creates a new record in the data source.
This step allows the app to persist business transactions.
Step 9 – Display Submitted Records
To display the submitted requests, use a Gallery Control.
The gallery is connected to the same data source and displays the list of submitted requests.
This enables users to:
- View previous requests
- Track request status
- Review submitted details
The gallery provides a simple list-based interface for displaying records dynamically.
Step 10 – Make the App Responsive
Responsive design ensures that the app works properly across tablets, desktops, and mobile devices.
To make the app responsive:
- Use containers for layout alignment
- Avoid hardcoded positioning
- Use dynamic sizing properties
- Test on different screen sizes
Responsive layouts improve usability and provide a better user experience.
Pro Tips – User Navigation Patterns
Use Consistent Navigation
Navigation buttons such as:
- Home
- Back
- Submit
should be placed consistently across screens.
This improves usability and user familiarity.
Use Meaningful Naming Standards
Use naming conventions for:
- Screens
- Controls
- Variables
Examples:
scrHomebtnSubmittxtEmployeeName
Consistent naming improves readability and maintainability.
Use Reusable Components
Reusable components can be created for:
- Headers
- Menus
- Footers
This reduces duplication and simplifies future changes.
Application Flow
The functional flow of the app looks like this:
User interacts with the Canvas App screen, Power Fx processes the user actions, data is saved to Dataverse, and the records are displayed back in the gallery.
This flow provides the foundation for most Canvas App implementations.
Key Takeaways
Building a Canvas App involves:
- Setting up the environment
- Creating screens
- Adding controls
- Implementing navigation logic
- Connecting data
- Displaying records
- Designing responsive layouts
Canvas Apps provide an efficient way to convert business requirements into working applications using a low-code platform.
This approach reduces development effort while accelerating solution delivery.
Conclusion
Canvas Apps are one of the most powerful capabilities within Microsoft Power Platform. They enable organizations to build business applications quickly while maintaining flexibility, scalability, and integration capabilities.
By following a structured approach—starting from environment setup to responsive UI design—teams can deliver applications faster and empower business users with modern digital solutions.
Noyr: Image taken from Microsoft learn for knowledge sharing purpose.
Discover more from Common Man Tips for Power Platform, Dynamics CRM,Azure
Subscribe to get the latest posts sent to your email.
