

Introduction: In Dynamics 365 , a solution publisher is used to identify its creator and used to uniquely identify the customizations that were done by individual from out of box default publishers that comes from product. And we are going to see about how to create a publisher in Dynamics CRM using classic mode and through Power Apps Maker Poral.
Let us see how to create a publisher in 2 ways
- Classic Way
- Power Apps Maker Portal [make.powerapps.com]
With Classic interface of Dynamics CRM, by following below steps we can create a publisher.
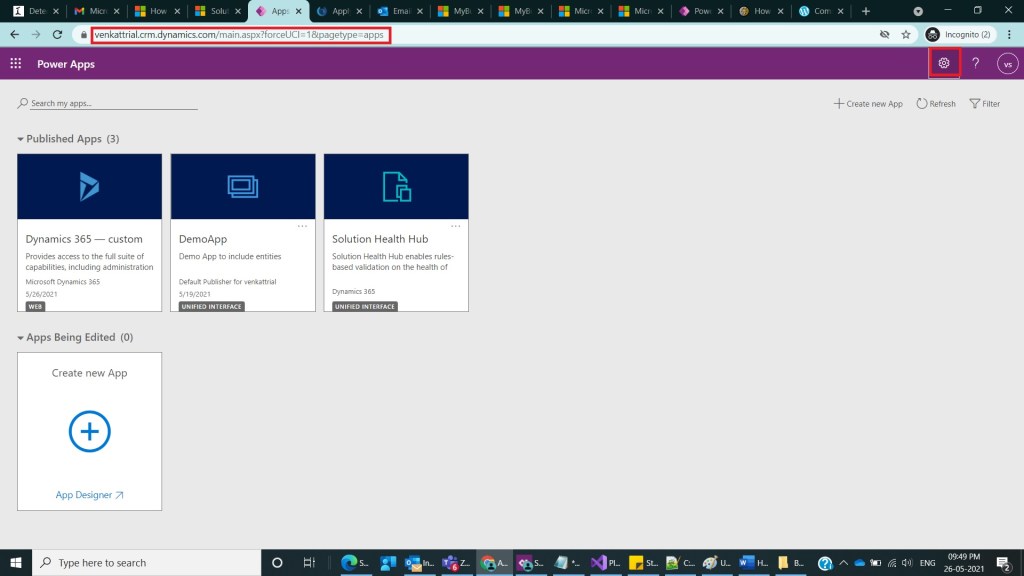
Step 1 :
Login to the trial / D365 CRM Environment by giving username and password, if you want to know about how to create a trial environment you can refer to my earlier blogs and as shown below and click on gear Icon
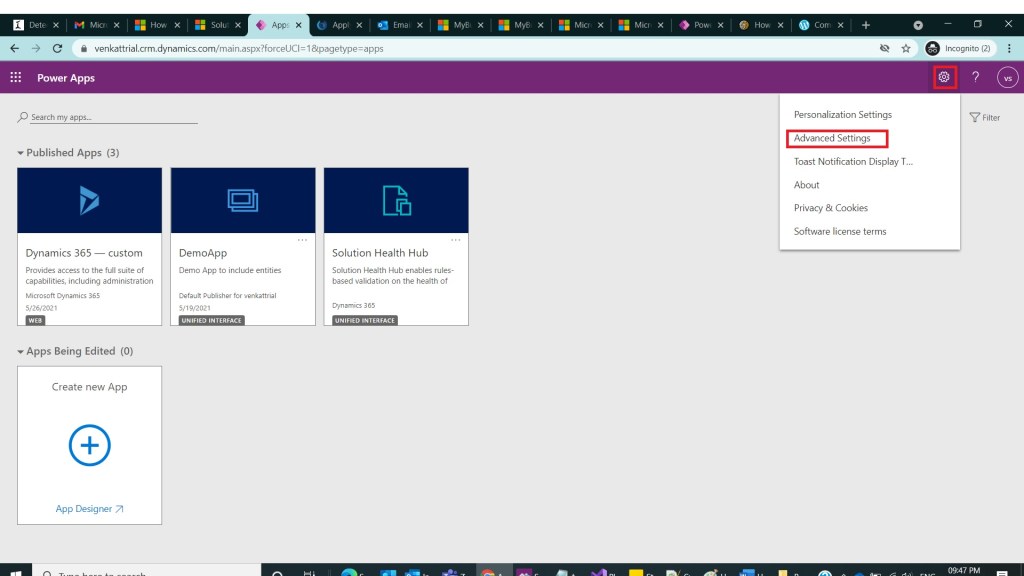
Step 2 :
After selection of gear icon , click on Advanced settings as shown below
Step 3 :
Upon selection of Advanced settings , user will be navigated to Settings page, and in settings page select Customizations as shown below

Step 4 :
User will be navigated to Customization’s page and in customizations page select Publishers as shown below

Step 5 :
Upon selection of Publishers, user will be navigated to publishers main view page , and select new publisher as shown below

Step 6 :
Once user clicks on New button as shown in above step 5, a new pop up window will be shown as shown below

Step 7 :
In the new publisher window, under General Tab provide mandatory fields Display Name, Name and Description and prefix of your choice and click on save and close as shown below.
Note: Name and prefix gets auto populated, they can be changed.

Step 8 :
Once user clicks on create save and close button as mentioned in step 7, user will be navigated to Publisher Main view in my case this is the default view, it varies with environment to environment and above created publisher will be listed in the list of publishers as shown below. And don’t forget to publish all customizations by clicking on Publish

(2) Creation of Publisher through Power Apps Maker Portal
Step 1 :
Go to make.powerapps.com and login with your user name and password and select your environment as shown below

Step 2 :
Navigate to Solutions as shown in the below screen and select new solution,you should see a quick create form for solutions will be shown

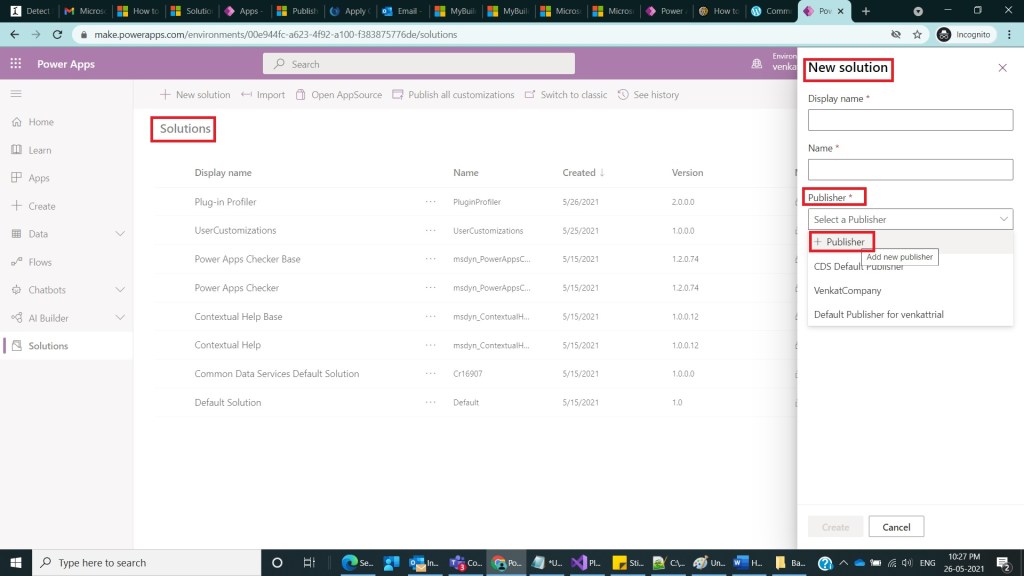
Step 3 :
In New Solution quick create form , select publisher dropdown and select on + Publisher option as shown below
Step 4 :
On Click on Publisher, a new quick create Publisher form will be shown to user, fill the details under properties tab as shown below

Step 5 :
Under Contact tab fill the details that you required and click on save as shown below

Step 6:
After click on save, user will be navigated to new solution window and if we expand publisher drop down, we could see our demo publisher created as shown below

Conclusion :
In this way we can create a publisher to uniquely identify our own changes from out of box product default publishers.
Discover more from Common Man Tips for Power Platform, Dynamics CRM,Azure
Subscribe to get the latest posts sent to your email.

Pingback: Back To Basics # : Curated List of Articles in a Single Page – Common Man Tips for Power Platform, Dynamics CRM,Azure