

Introduction:
In Dynamics 365 CRM or Power Platform, under core tools category Code Generation Tool CrmSvcUtil.exe is useful to generate early bound class file which makes life easy for developer by simply instantiating class and Visual Studio Intellisense provide the names of properties and relationships without the need of explicitly memorize names of properties. By using the following process one can easily generate early bound class file in few minutes.
Step 1:
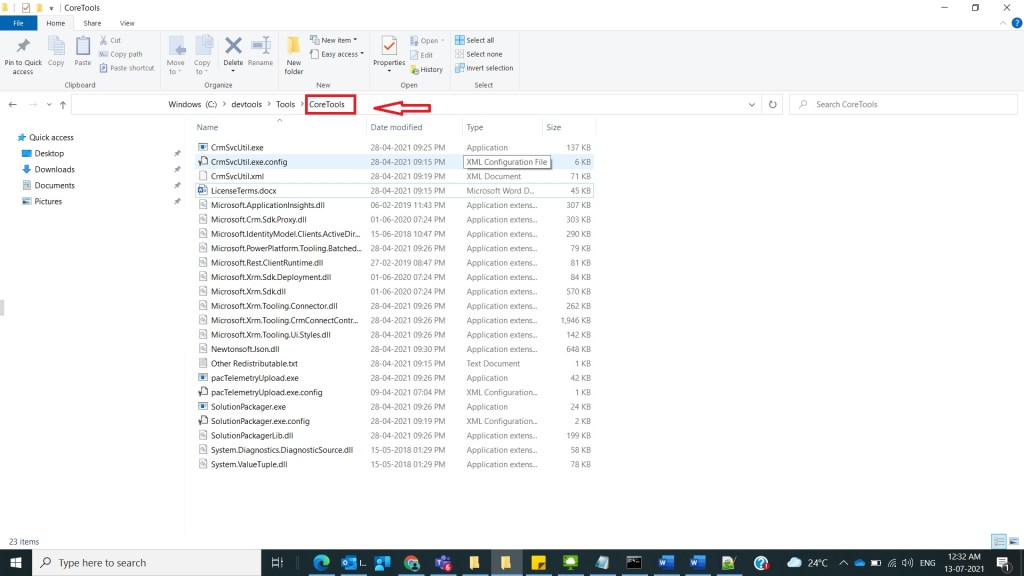
Navigate to the folder where Core CRM Tools are generated by Power shell as shown in below, if you want to know about how to generate CRM tools using power shell, refer to my earlier post.
Step 2:
After Step 1, copy path of Core Tools and then open Developer Command Prompt of Visual Studio from Visual studio Folder which is present in Windows Start Menu and double click on it and open as shown below.

Step 3:
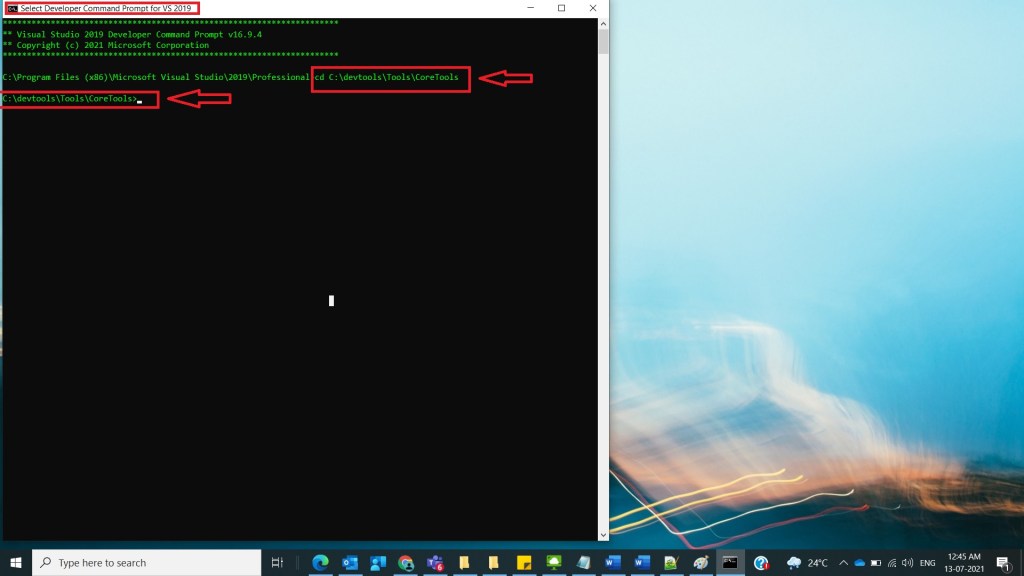
After Step 2, Developer Command Prompt gets opened, here as an example you could see Developer Command Prompt for VS 2019 gets opened as shown below.

Step 4:
After Step3, type cd and Paste path that is copied in step2 and click on enter key as shown below.
Example: cd C:\devtools\Tools\CoreTools
Step 5:
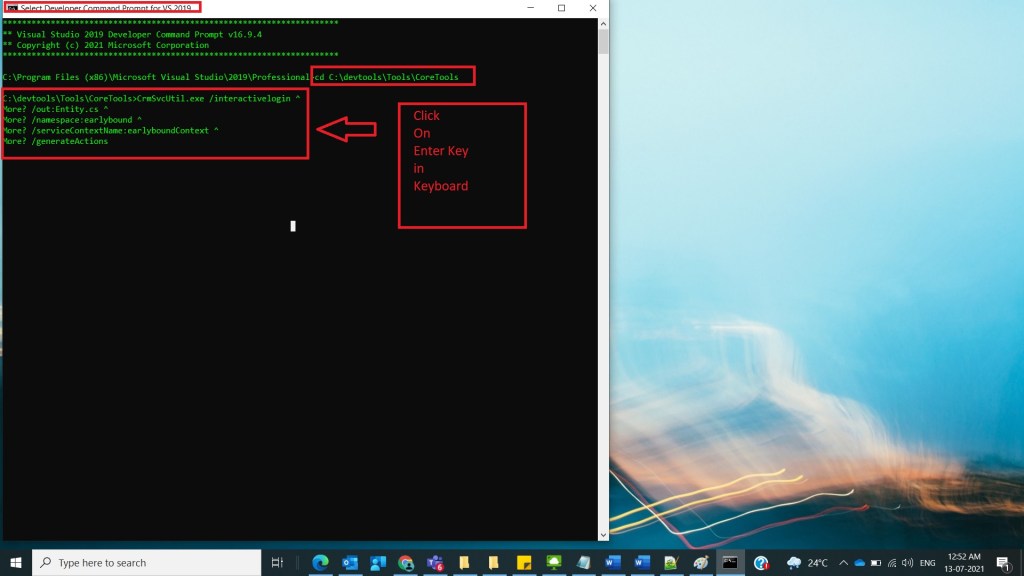
After Step4, we must give output file name where early bound class content gets generated, namespace name, service Context Name and click on enter as shown below.
Syntax:
CrmSvcUtil.exe /interactivelogin ^
/out:<outputFilename>.cs ^
/namespace:<outputNamespace> ^
/serviceContextName:<serviceContextName> ^
/generateActions
Example:
CrmSvcUtil.exe /interactivelogin ^
/out:Entity.cs ^
/namespace:earlybound ^
/serviceContextName:earlyboundContext ^
/generateActions
Step 6:
After Step5, a popup window will come where provide required CRM Environment details and click on login as shown below figure.

Step 7:
After Step6, after successful login to respective Dynamics CRM post provision of username and password then window will gets closed as shown below.

Step 8:
After Step7, in the background early bound class generation will happen and respective class file gets generated here as an example Entity.cs file will be created, and a message can be seen in dos command prompt as shown below.

Step 9:
After Step8, to test whether the given Entity.cs file got generated or not, navigate to the core tools folder and observe Entity.cs file gets generated with latest time stamp as shown below.

Step 10:
After Step9, to test whether the given Entity.cs file have content or not, open Entity.cs file and see content as shown below.

Note:
- Make sure to execute code generation tool from the respective Core Tools Folder.
- If any case wants to run this tool from another folder location, then make sure that a copy of the Microsoft.Xrm.Sdk.dll assembly is in that same folder.
References: https://docs.microsoft.com/en-us/powerapps/developer/data-platform/org-service/generate-early-bound-classes
Conclusion: In this way one can easily generate early bound class file which can be used in CRM custom development in few minutes.
Discover more from Common Man Tips for Power Platform, Dynamics CRM,Azure
Subscribe to get the latest posts sent to your email.

Pingback: Rewind July 2021 – Common Man Tips for Power Platform, Dynamics CRM,Azure
Pingback: Back To Basics # : Curated List of Articles in a Single Page – Common Man Tips for Power Platform, Dynamics CRM,Azure