

Introduction:
In Dynamics 365 CRM or Power Platform, under core tools category Package Deployer Tool enables users to deploy packages to a selected Dynamics CRM Environment which makes life easy by simply configuring one or more Dynamics / Dataverse solution files[CRM Customizations solution files], one or more Data Files (Data file extracted from Dynamics CRM Environment using Data Migration Utility), one or more csv files (csv files with list of accounts/ contacts etc ) without writing single line of code and in few minutes changes can be deployed .
Step 1:
First we have to download Microsoft Dynamics CRM SDK Templates for Visual Studio that contains the package template by going into the following url MicrosoftDynamicsCRMSDKTemplates [https://marketplace.visualstudio.com/items?itemName=DynamicsCRMPG.MicrosoftDynamicsCRMSDKTemplates]and download it as shown in the below figure.

Step 2:
After Step 1 , a vsix file will be downloaded with name CRMSDKTemplates .Navigate to the folder where above file was downloaded, Double-click the CRMSDKTemplates.vsix file and it will take some time for installation as shown in the below figure.

Step 3:
After Step 2 , a popup window will come and you can see message initializing which adds template to Visual studio and automatically closes once template added to Visual Studio as shown in the below figure.

Step 4:
After Step 3 , if template successfully added into Visual Studio then a CRM Package template will be added .Now Open Visual studio and create a new project with the below navigation Open Visual Studio and then go to Menu and select – File-> New -> Project which will open a new window to create a new project , and in the search box type CRM Package and then select CRM Package and then click on Next as shown in the below figure.

Step 5:
After Step 4 , user will be navigated to next window and there give the project name and location to store as an example gave CRMPackageDeploymentTemplateSample and click on Create as shown in the below figure.

Step 6:
After Step 5 , separate solution will be created and observe folder structure and you can observe PkgFolder folderand ImportConfig.xml xml file also created as shown in the below figure.

Step 7:
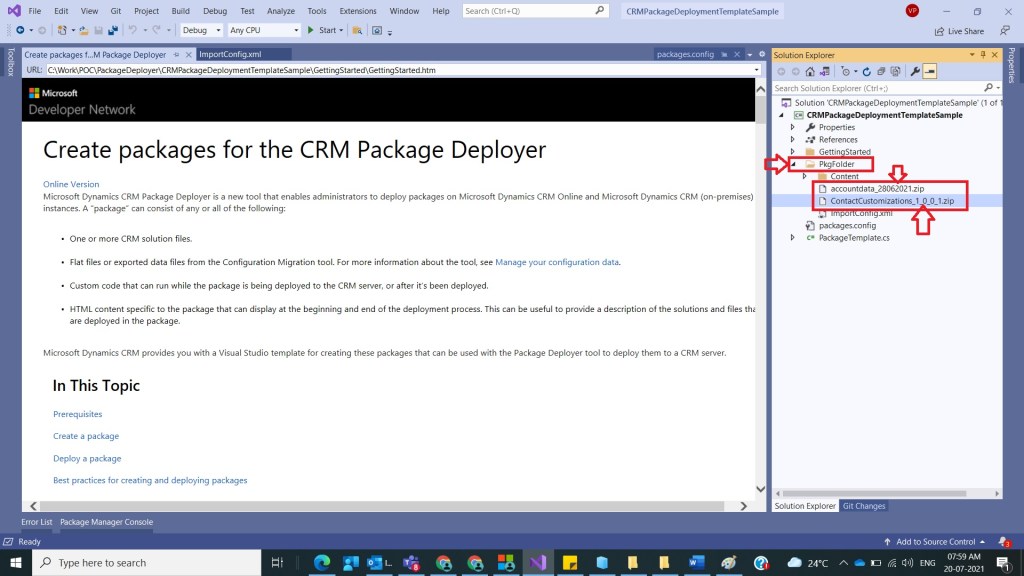
After Step 6 , add your CRM customizations Solution exported Zip files and data files into PkgFolder only as an example I will be adding 1 CRM Customizations Solution zip type file with name ContactCustomizations_1_0_0_1 and a data zip type file with name accountdata_28062021 and save it as shown in the below figure.
Step 8:
After Step 7 , post addition of zip files to newly created CRM solution open ImportConfig.xml file under PkgFolder Folder and specify data file name against crmmigdataimportfile as accountdata_28062021.zip marked with number 1 andCRM Solution zip file name under solutionpackagefilename as ContactCustomizations_1_0_0_1.zip marked with number 2 andwhich were added in the above step and comment out the other xml content present in file and save it as shown in the below figure.

Step 9:
After Step 8, build Solution as shown in the below figure.

Step 10:
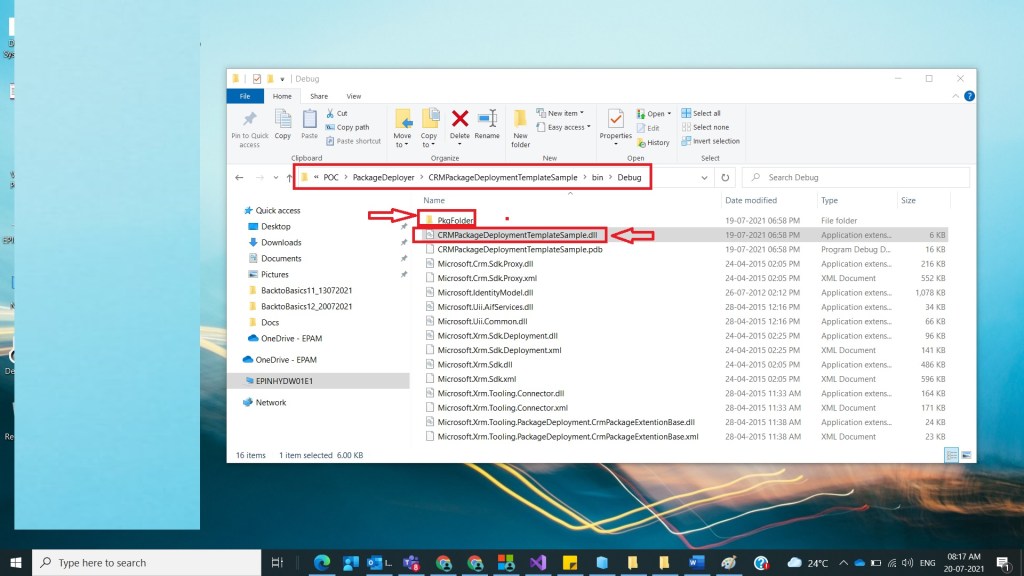
After Step 9, all Nuget packages get re-aligned to CRM Related Dll’s and then a dll file with name CRMPackageDeploymentTemplateSample.dll gets generated and folder PkgFolder also gets generated under Debug/Release Folder -> Bin Folder , here as an example I considered Debug folder as shown in the below figure.
Step 11:
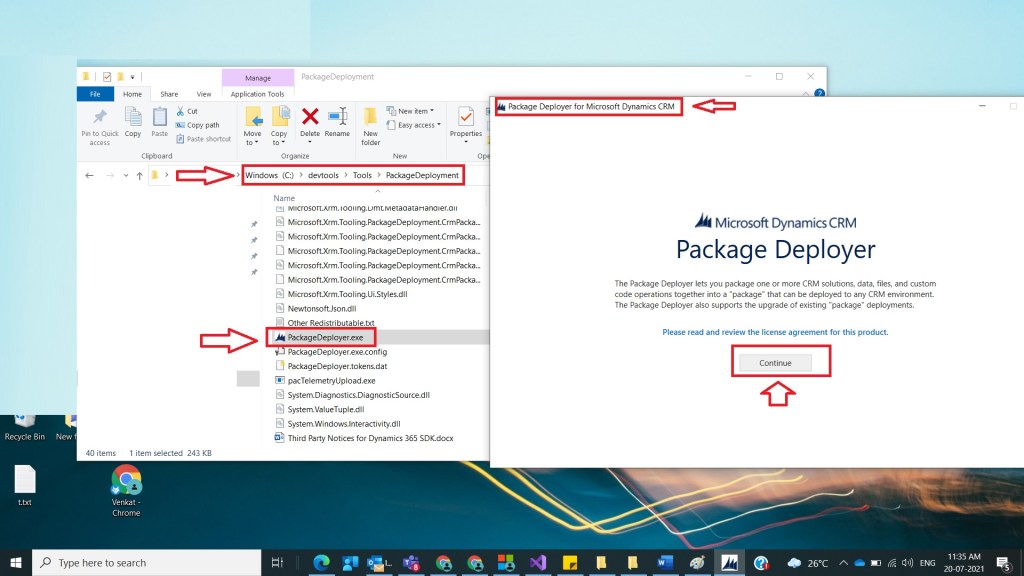
After Step 10, copy above highlighted CRMPackageDeploymentTemplateSample.dll and folder PkgFolder and paste them in Tools\PackageDeployment folder which were generated by using power shell refer to my earlier article to know how to generate here as shown in the below figure.

Step 12:
After Step 11, open required CRM solution and observe no new solutions are present in the selected crm environment as well as no accounts are present in account entity before execution of Package Deployer Tool as shown in the below figure.

Step 13:
After Step 12, navigate to PackageDeployment folder under Tools and click on PackageDeployer.exe a new window with title Package Deployer for Microsoft Dynamics CRM will open and then click on continue in that window as shown in the below figure.
Step 14:
After Step 13, new popup will gets displayed there select option Display List of available organizations and then click on login and provide required login credentials as shown in the below figure.

Step 15:
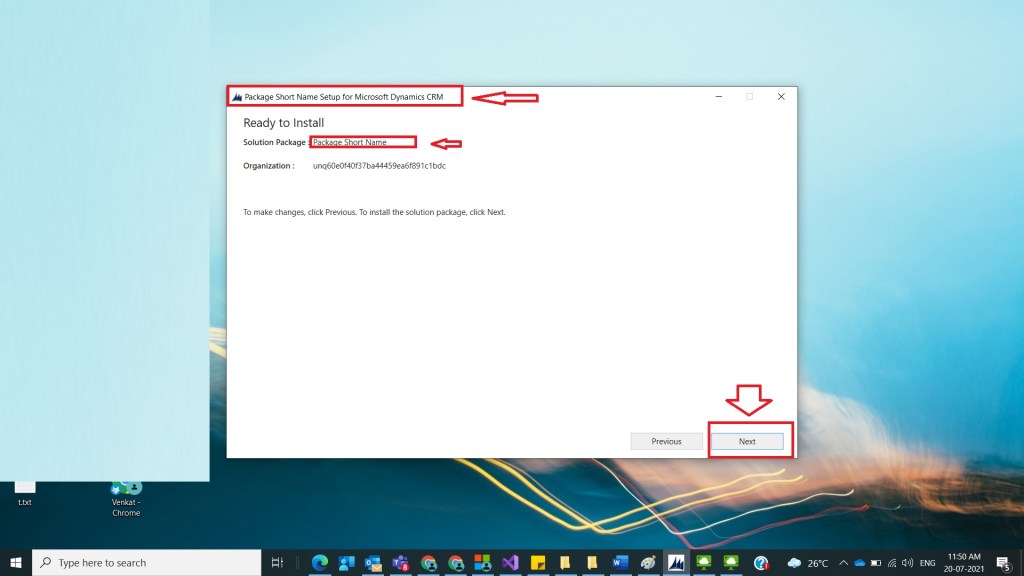
After Step 14, after successful validation of credentials new window get’s displayed which infers Package deployer tool is working correctly and in the new window click on Next button as shown in the below figure.

Step 16:
After Step 15, you will see below screen and click on Next button as shown in the figure.
Step 17:
After Step 16, if all the files are correctly mapped from ImportConfig.xml then we can observe all green tick marks and if you want to see log file,it can be viewed by opening hyperlink and click on Next button as shown in the figure.

Step 18:
After Step 17,Executing install actions gets executed and as we have considered CRM customizations Solution Zip file and Data File we could see success messages (green ticks) of both solution and data import and click on Next button as shown in the figure.

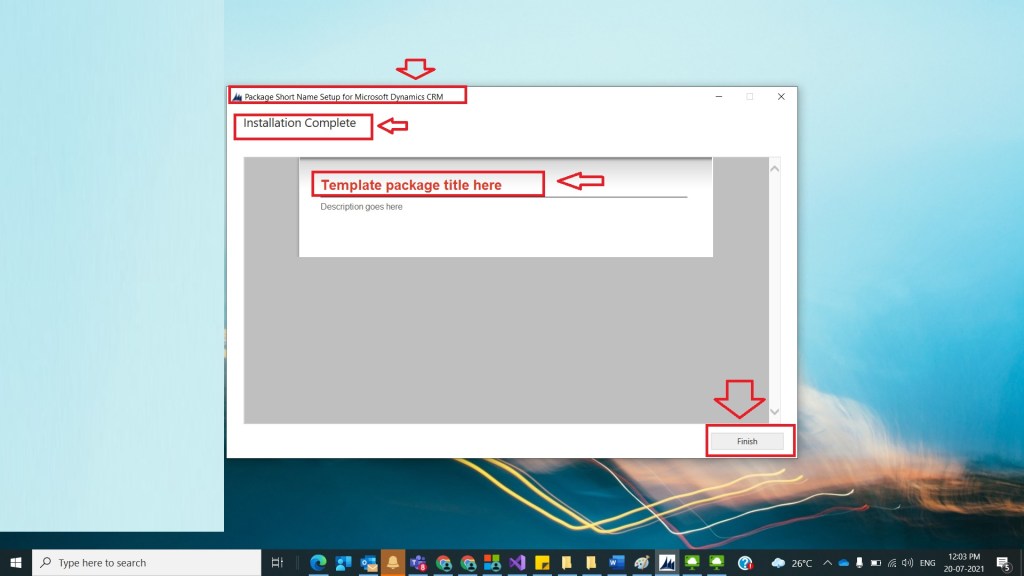
Step 19:
After Step 18, a new window gets opened with Installation Complete message and click on Finish Button as shown in the below figure.
Step 20:
After Step 19,to test whether above mentioned solution and data file imported successfully or not, open CRM Environment and observe solutions and account record in Account entity as shown in the below figure.

Note:
- While installation of Microsoft Dynamics CRM SDK Templates for Visual Studio, make sure all the Visual Studio windows are closed.
- In ImportConfig.xml ,make sure to give exact names which are added in Package Folder in Visual Studio solution as specified in Step 5.
- Make sure to comment out lines which are present in ImportConfig.xml file which you are not going to do deployment.
- In case of any errors, verify log file as specified in Step 17.
- All references in Visual Studio solution gets automatically restored as specified in Step 9.
Conclusion: In this way one can easily use Package Deployer Tool without writing single line of code and in few minutes changes can be deployed to the required environment.
Discover more from Common Man Tips for Power Platform, Dynamics CRM,Azure
Subscribe to get the latest posts sent to your email.

Pingback: Rewind July 2021 – Common Man Tips for Power Platform, Dynamics CRM,Azure
Pingback: Back To Basics # : Curated List of Articles in a Single Page – Common Man Tips for Power Platform, Dynamics CRM,Azure