

Introduction:
In Power Automate, we must consider about performance related things while working on apply to each action. During most of the scenarios concurrency control option present in apply to each action will come for rescue to process records faster pace with the usage of 50 parallel threads rather than 1 by 1 to process all the collection of records those are present in apply to each. As an example on list action on contacts that is present in Dataverse along with apply to each loop was used to explain this behaviour.
Step 1:
Login to the required Power Apps environment using URL make.powerapps.com by providing username and password and click on Flows on the left-hand side as shown in the below figure.

Step 2:
After Step 1, Click on New Flow and select instant cloud flow and provide the trigger as Manually trigger a flow and click on Create as shown in the below figure.

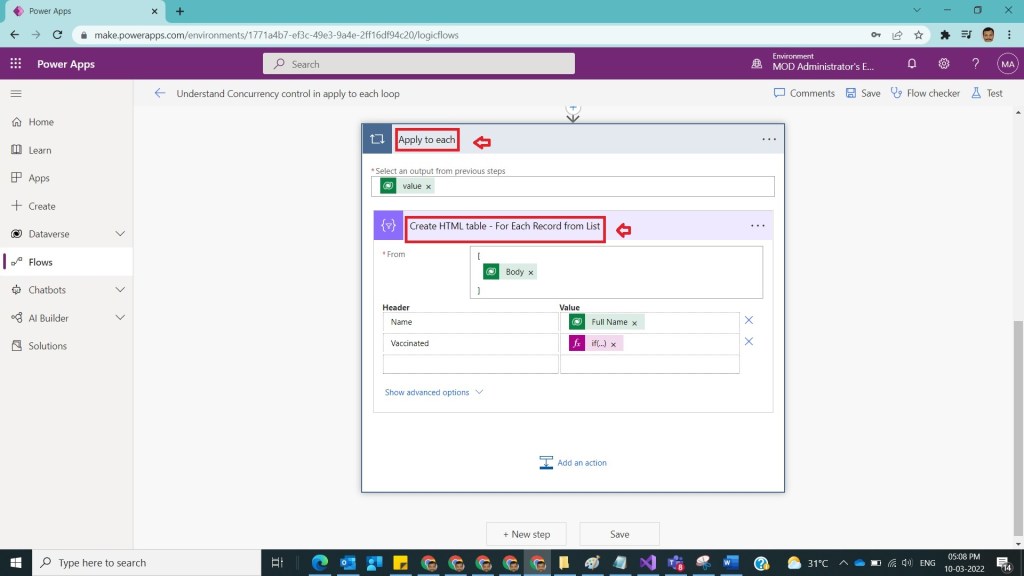
Step 3:
After Step 2, name the flow as Understand Concurrency control in apply to each loop and take an list rows action in Dataverse and select contacts as table name and write the fetchxml query as below
<fetch top=”50″ >
<entity name=”contact”>
</entity>
</fetch>
as shown in the below figure.

Step 4:
After Step 3, take apply to each action create html table – For each record from list as shown in the below figure.
Step 5:
After Step 4, save and run the flow and observe the time of 3 seconds for execution of apply to each loop as shown in the below figure.

Step 6:
After Step 5, now select Apply to each step and click on 3 dots and click on settings as shown in the below figure.

Step 7:
After Step 6, enable Concurrency control to On and provide Degree of Parallelism to 50 and click on Done as shown in the below figure.

Step 8:
After Step 7, now save and run the flow and observe the execution time of Apply to each loop gets reduced to 2seconds as shown in the below figure.

Note:
- Make sure to save the flow whenever you try expressions.
- Here in the example considered fetching data from list records on Dataverse , in other scenarios like fetching data from other resources like sharepoint and traversing the items inside loop one can observe significant performance improvement.
- Don’t use this concurrency control, if at all any logic was return to process items in a specific order like updating a variable then enabling concurrency might not be a good idea because the loops are running parallelly you will get inaccurate results in those scenarios , ensure that concurrency control was not used.
- I have concentrated only to explain concurrency control in apply to each loop only not on creating html table.
Conclusion: In this way we can use concurrency control in power automate to decrease execution time of apply to each loop.
Discover more from Common Man Tips for Power Platform, Dynamics CRM,Azure
Subscribe to get the latest posts sent to your email.

Pingback: Rewind March 2022 – Common Man Tips for Power Platform, Dynamics CRM,Azure
Hello… thank you for sharing your post about concurrency control… i have a question… if we apply the concurrency control say on a when an email arrives trigger, and set the limit to 1, and a lot of emails satisfying the trigger arrives, what will happen to the other concurrent flows? will they be cancelled? will they float until the 1 run is done? thank you so much!
LikeLike
This was not tried, I suspect , flows will be in waiting state
LikeLike